
NeoLumn8! Mazda MX-5 ND/ND2/ND3 Dynamic LED Running Light Kit
Attention US customers: Unfortunately, due to the ongoing tariff circus, I’ve put a pause on US shipments. If it gets resolved, or costs are made more reasonable, shipments will resume. If you are planning to travel near the Toronto area, you can pick one up. EU/UK customers, NeoLumn8 is still available for you.
Limited run sale on now for 5 units only: $180 CAD + shipping + 4% PayPal fees. Regular price is $230 CAD.
I want one! If you are near Toronto (Burlington specifically), you can drop by, pick one up and save on shipping and PP fees (cash only).
Backstory:
A few years ago, I made NeoStrip for my ND2, which got a lot of attention. I wanted to share the love, so I created NeoLumn8 and made it easy to install tucked away in the trunk (or boot!). No cutting/splicing of wires or soldering. Installation takes about 20 minutes, and there’s a detailed installation page with videos.
What is NeoLumn8?
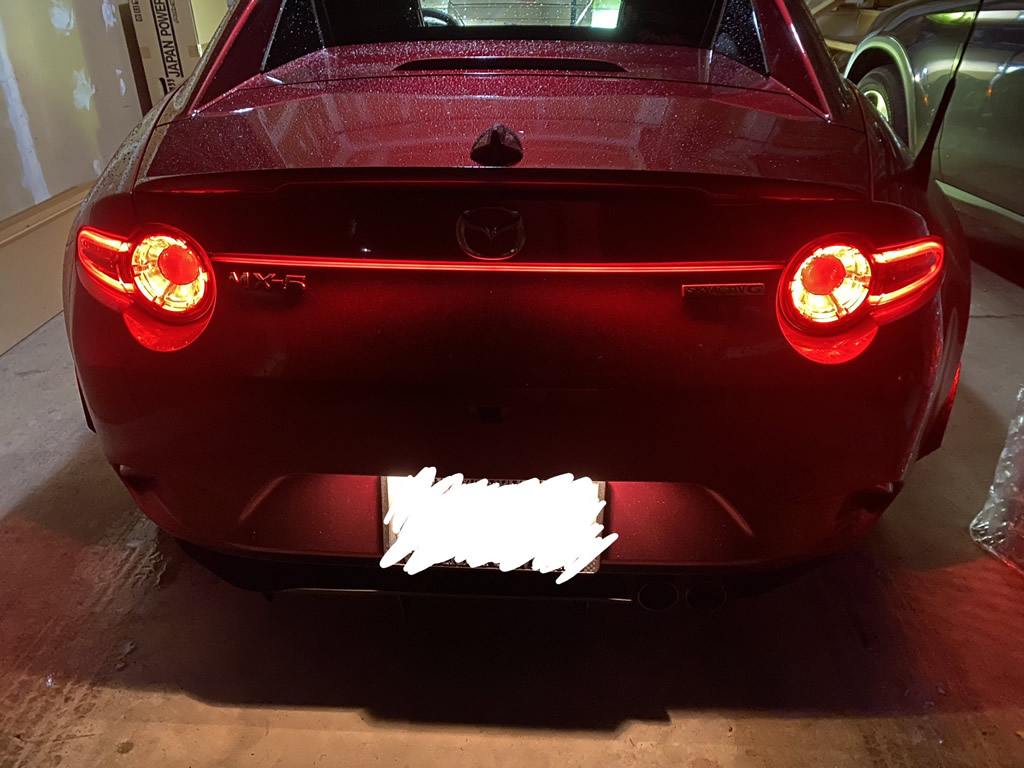
It’s a dynamic multi-colour NeoPixel LED running light that is tucked up inside the trunk lid and illuminates along the gap between the taillights. It’s very different from the others out there with multiple sequences to choose from. The selected sequence shows on start-up, then switches to a running light that also changes with braking (demo videos below). There are also different brake modes if desired. Changing sequences is simple. Use the button on the controller to scroll through sequence/brake options. Then, a long press saves the setting. Settings are stored in memory and persistent. The LED strip has a diffuse flexible silicone casing that ensures nice light spread across the strip.
Fitment: Current fitment is ND/ND2’s 2016-2023 (pinout) and ND3’s 2024/2025. Note, there are 2 different wiring harnesses, so you will need to identify which model year you have when reaching out. For more info, have a look at the installation page and videos.
Feb 2026: Check out the latest features including added country-specific flag sequences:

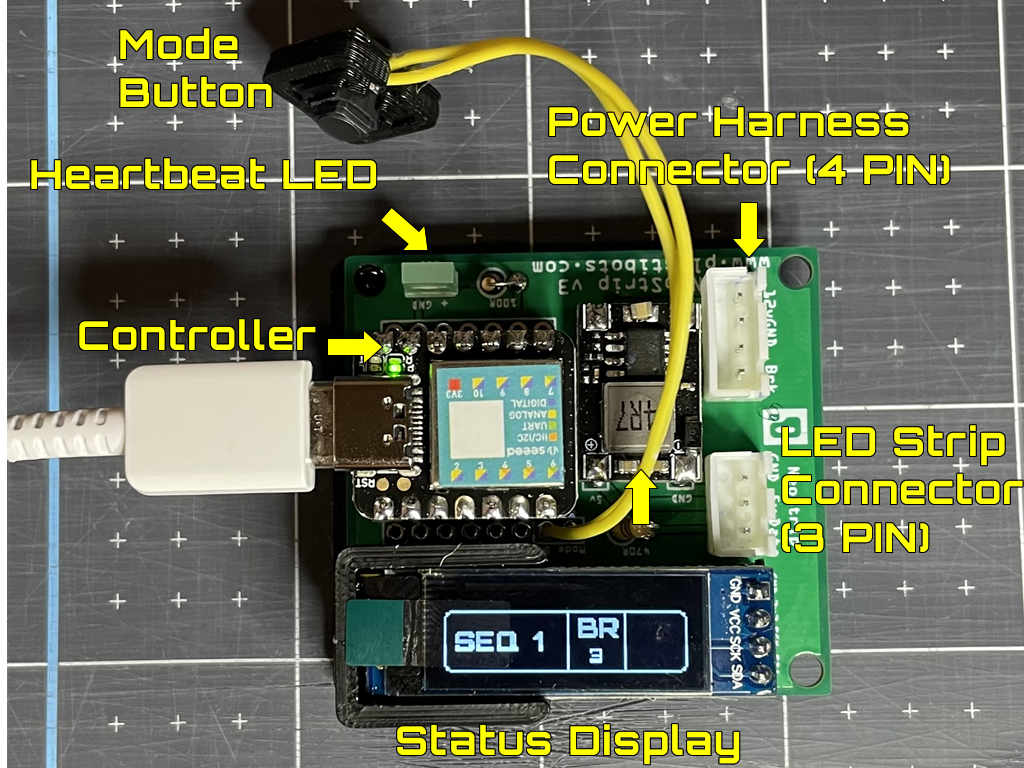
How it works: When the car starts (running lights must come on either by switch or auto mode), NeoLumn8 will play the saved sequence, then revert to running light mode (basically all red). During braking, NeoLumn8 does a red sweep out from the middle to the sides (think Audi). Sequence and brake mode options can be set on the controller. The OLED display shows the current sequence, brake mode and status. To change a mode, push the button to scroll through each, then hold the button to set it. The strip will flash green and the sequence will play. It’s now saved to memory.
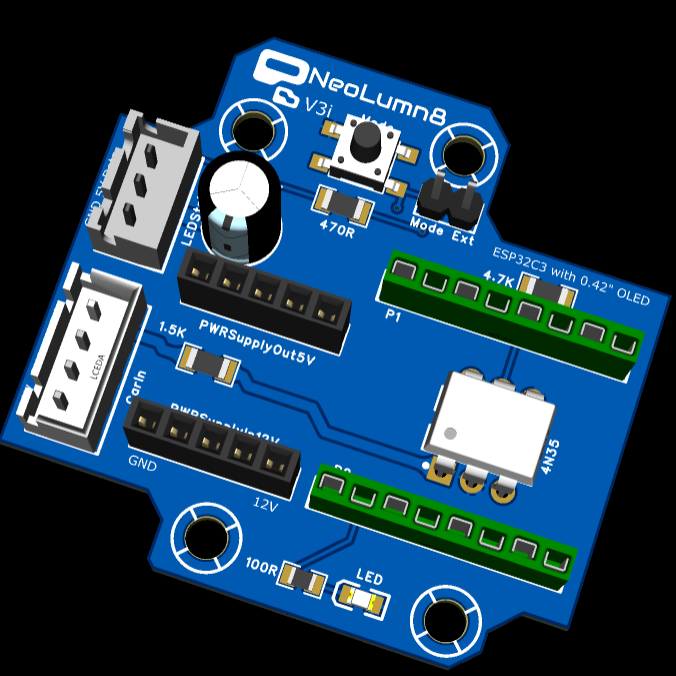
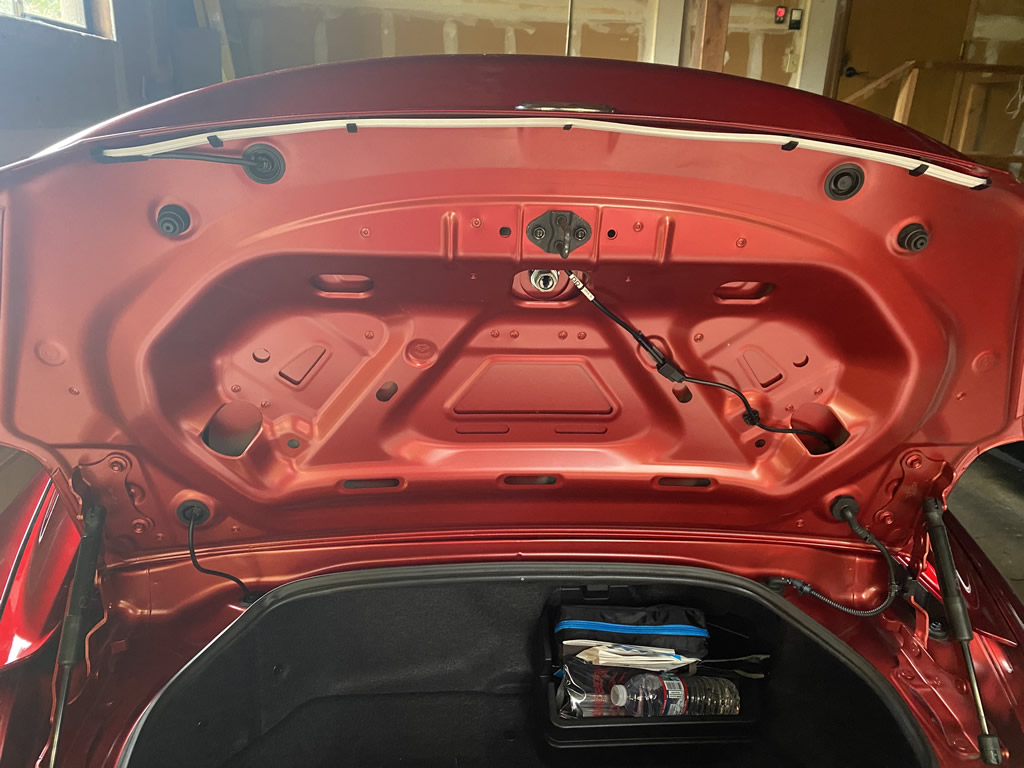
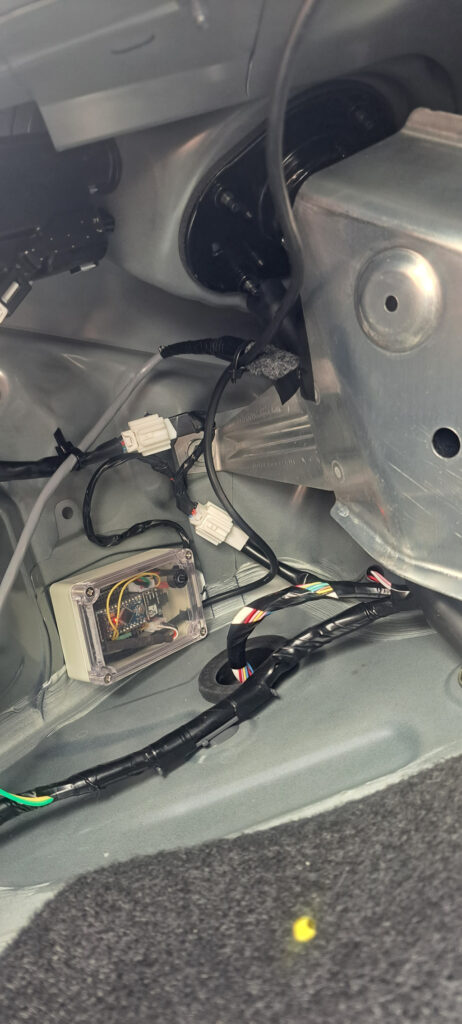
The NeoLumn8 LED strip is mounted under the trunk lid (pics below), with the controller inside the left trunk area. The system is powered by the rear taillights, so it does not draw power when the car / lights are off. Note the controller has gone through a few improvements/changes. Picture is for reference only.
I build these in my spare time in small batches with love! I don’t have a storefront, so drop me a note if interested. In order to get a shipping estimate, I will need your full address. If you order, will also need a phone # (for customs). Will also need the model year (harnesses are different with 2024+). Installation instructions (with video) are also provided. The controller may not be exactly as shown in the sample images. Functionality is the same, but components, display etc. may be different. By purchasing this kit you accept the Limitation of Liability
The following are a list of sequences and braking modes. When the vehicle lights are powered or turned on, it runs the selected sequence you have set, then switches to running light mode. Brake modes triggers once with braking then again after a delay period (so not to annoy drivers behind you).
Sequences (see video above):
- Default (red running light mode)
- K.I.T.T. / Larson Scanner (nuff said!)
- K.I.T.T. / Larson Scanner in Colour
- Red Bounce
- Colour Bounce
- K.I.T.T & Red Bounce
- K.I.T.T & Red Bounce both in Colour
- Rainbow Dance (holy colour!)
- Red Outward Sweep (slower)
- Red Outward Sweep (faster)
- Blue Outward Sweep (slower)
- Blue Outward Sweep (faster)
- Plot Outwards Red
- Plot Outwards Blue
- No Running Light – Brakes Only (strip is off except when braking)
- Country Flags: Canada, UK, USA 1, USA 2, Germany, Italy, Hungary, France, Sweden, Finland, China, Brazil, Japan (many of these flags share colours of other countries – see video above)
Brake Modes:
- Sweep Out (from middle to sides – default)
- Fast Flash **
- Fast Flash then Slow Flash **
- ** Note – The flashing brake modes trigger on first brake application, then a 20 second delay prevents it from repeating (instead shows the sweep out). Once the delay elapses, it repeats again the next time you re-apply braking. See the demo video for more info.
More videos. Note that some may be outdated, and others relate to my NeoLumn8 Advanced version.
FAQ:
- What’s included? NeoLumn8 controller unit & LED strip, velcro, wiring & mounting clips, zip ties, and a inline harness connector for ND/ND2 rear taillights (plug-and-play).
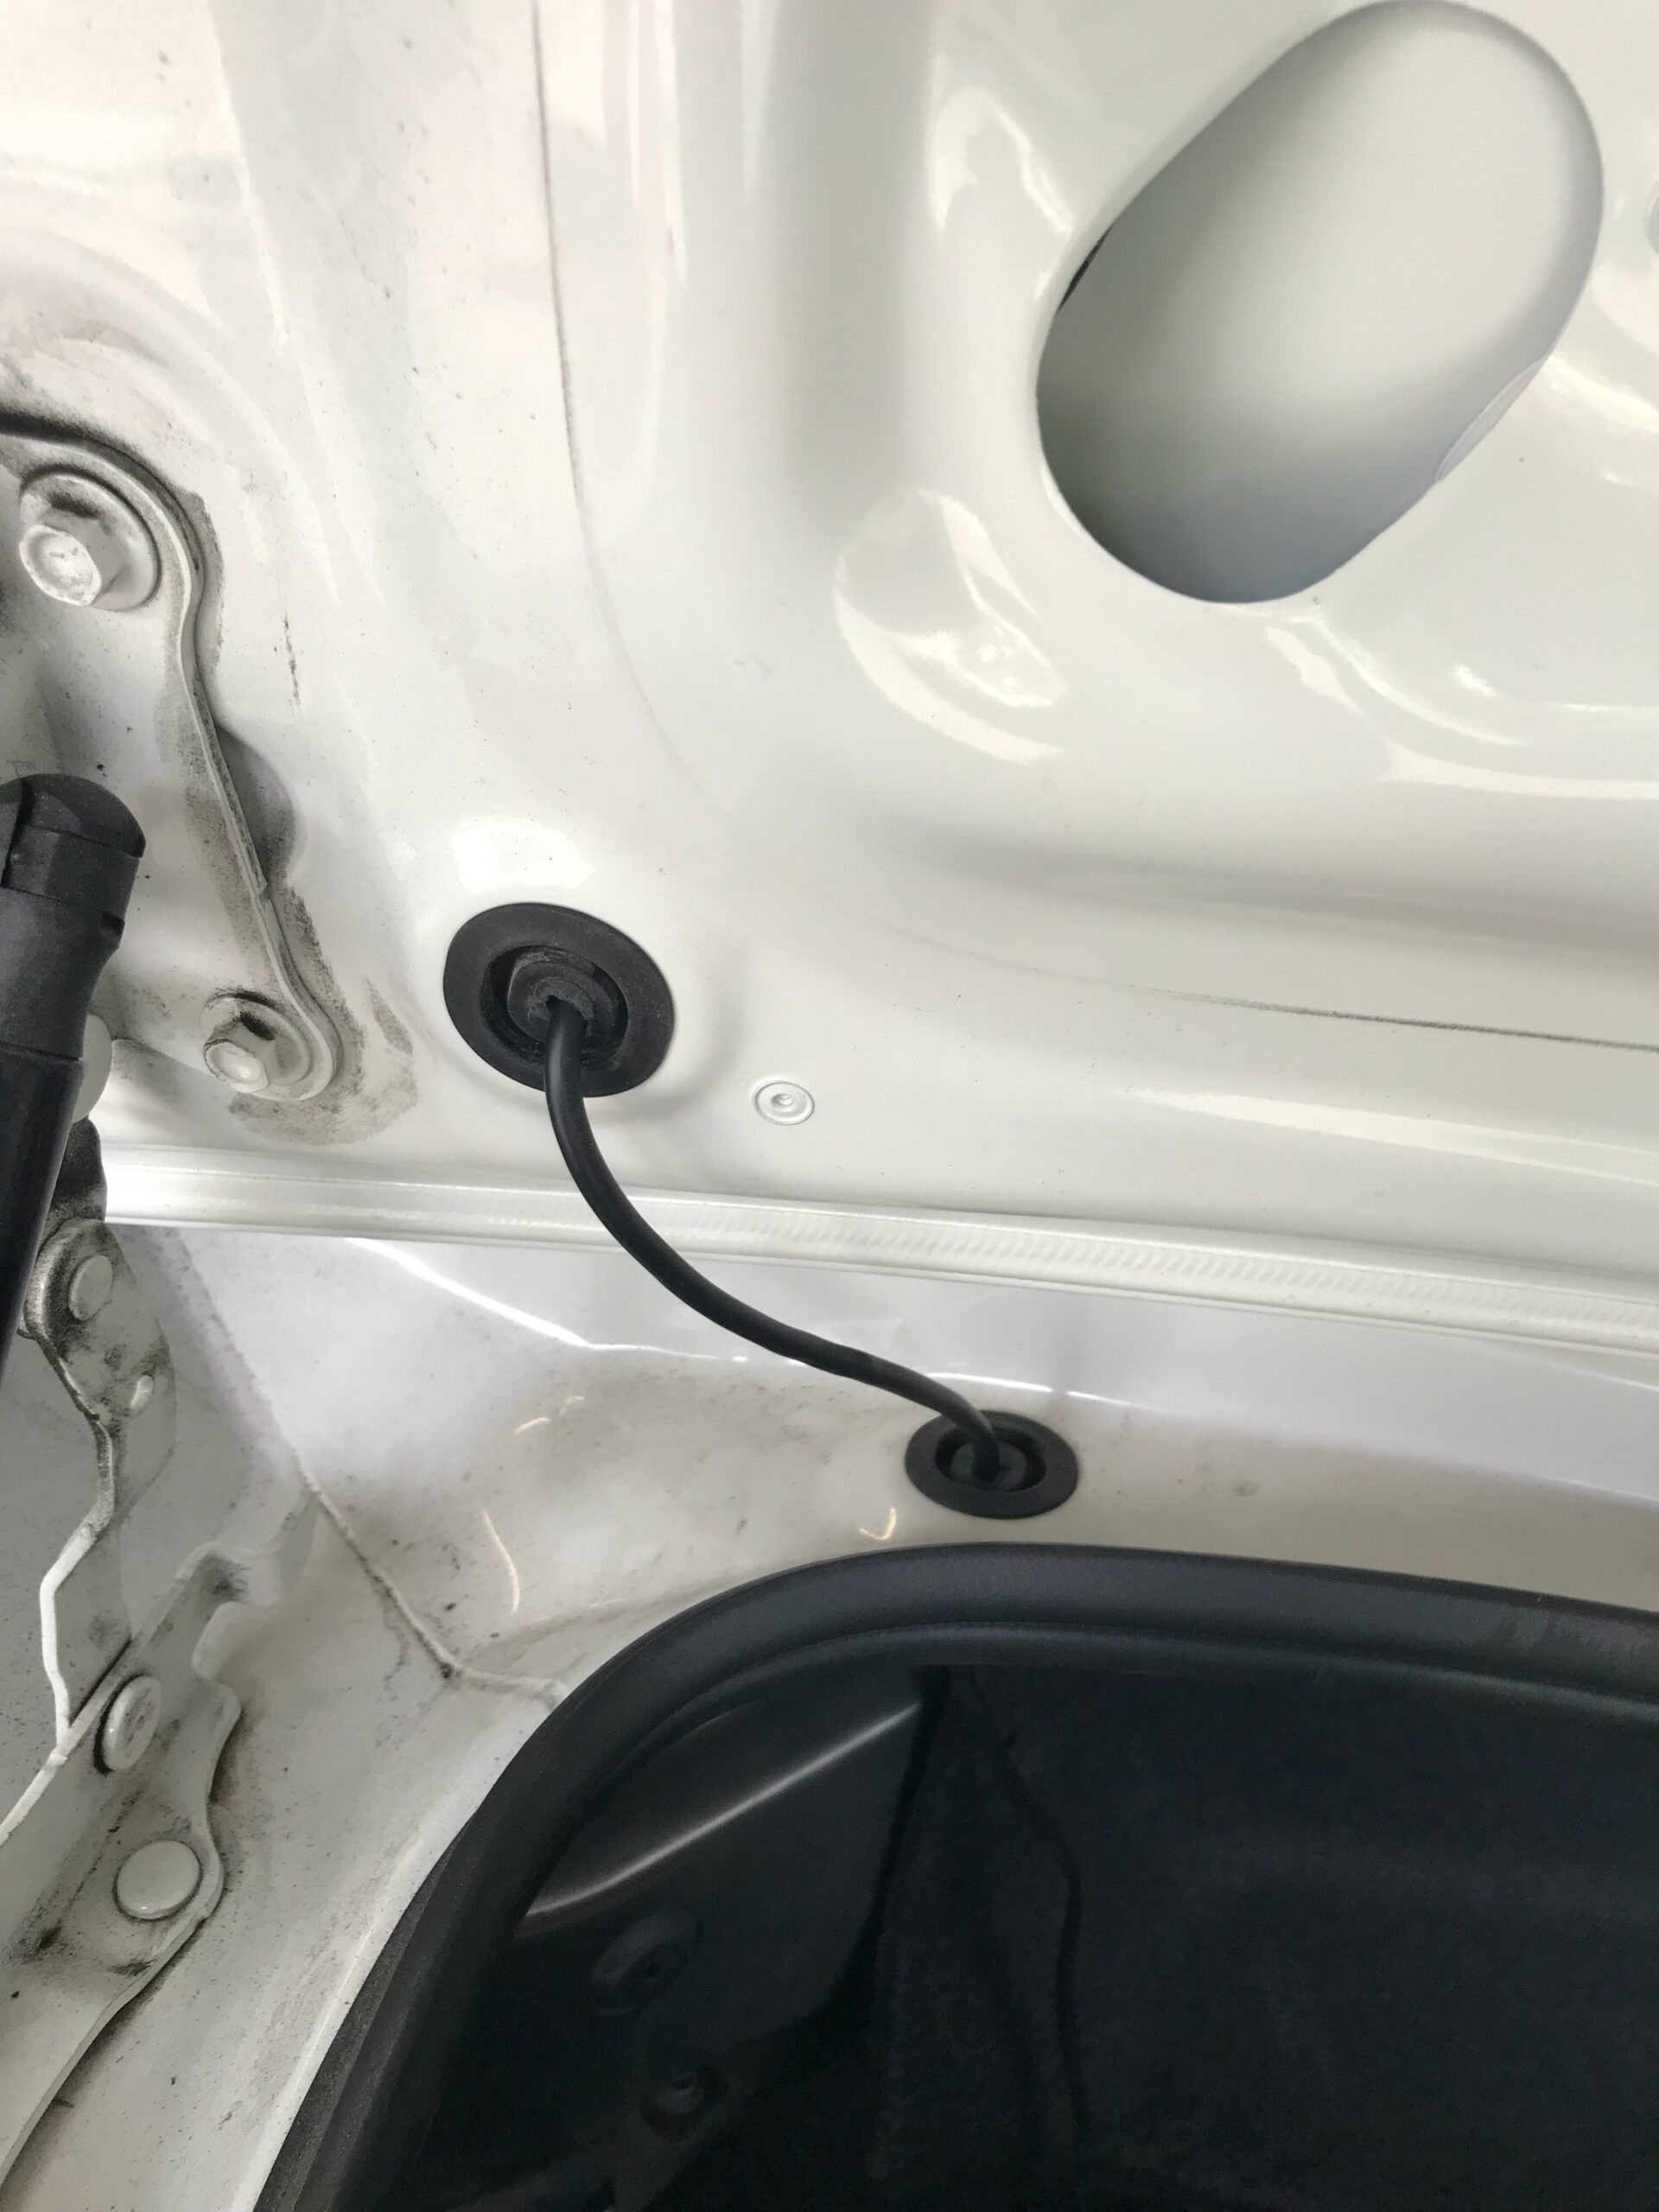
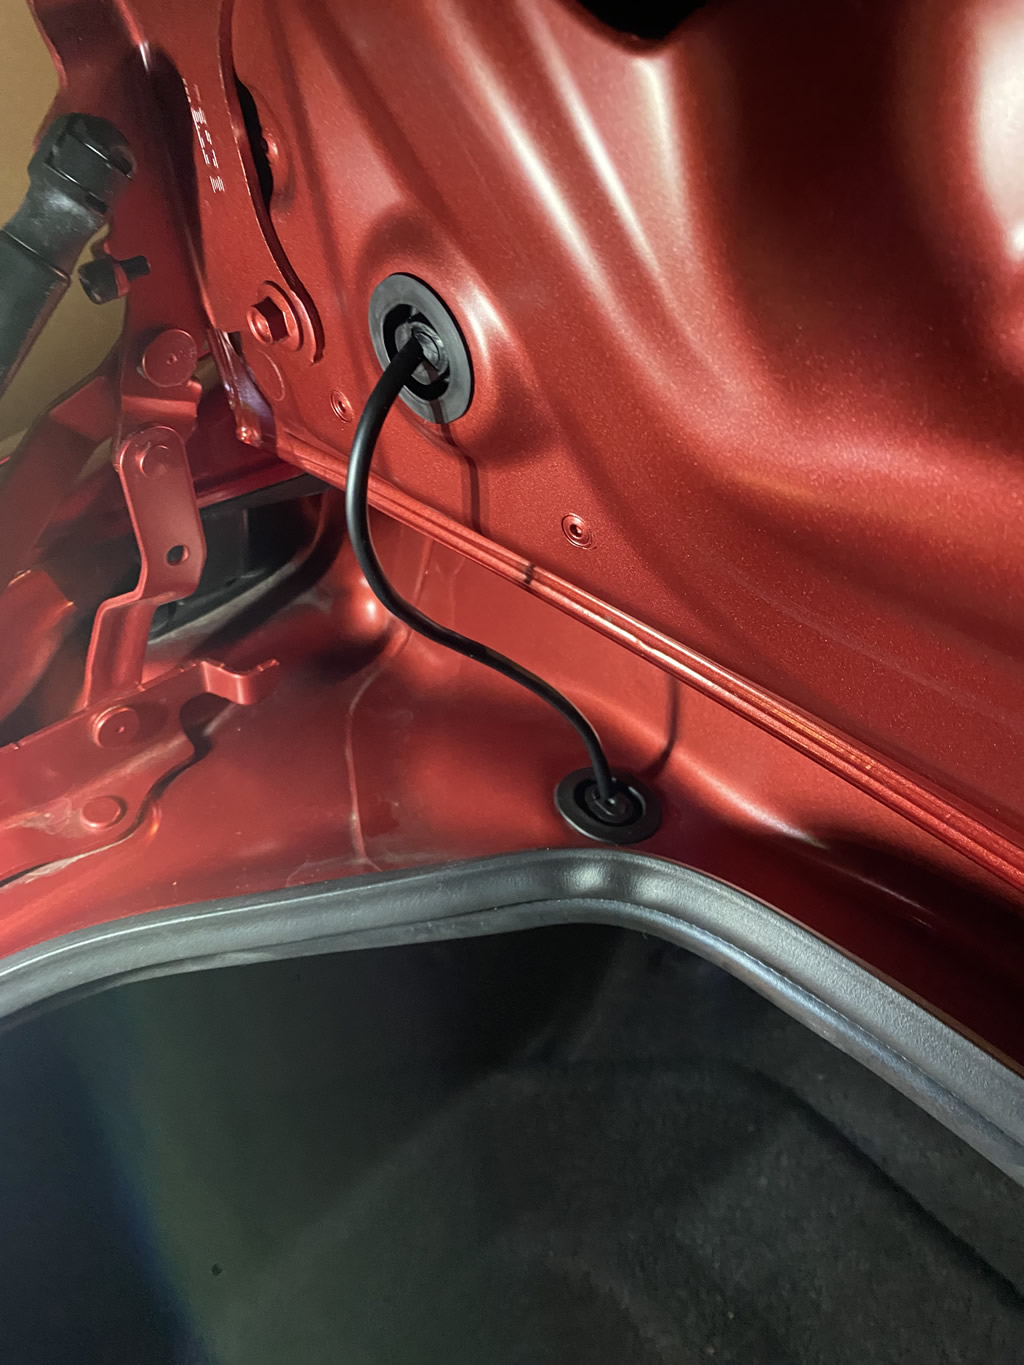
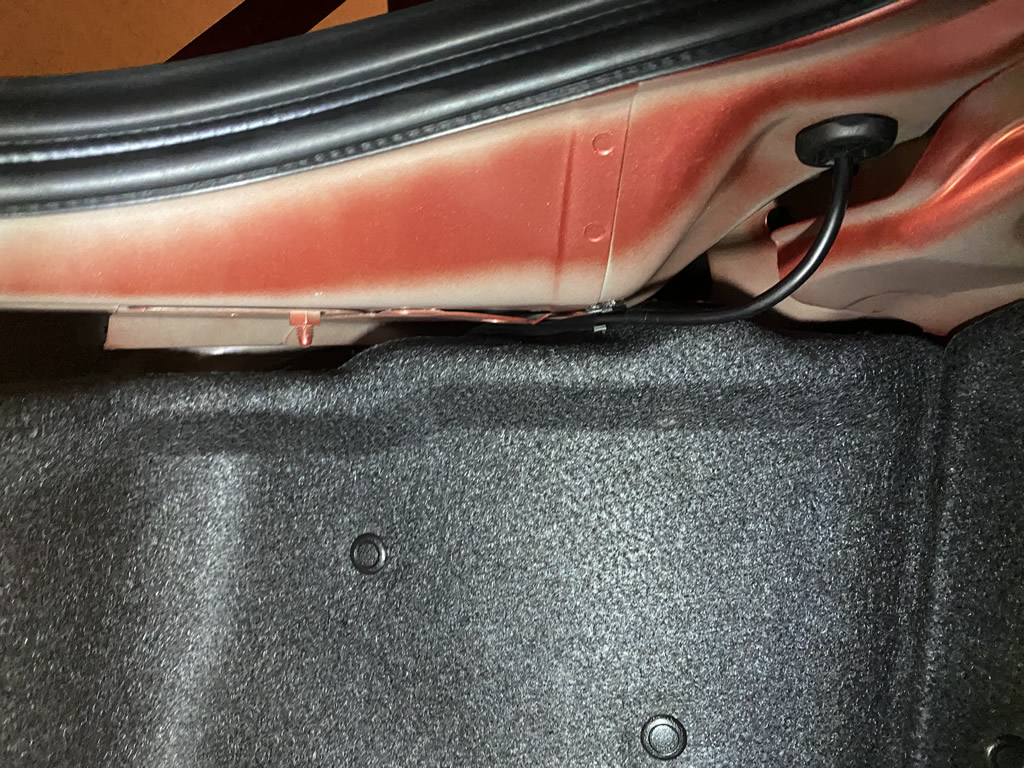
- What installation is required? Installation is easy and an instruction page with video is provided. Estimated time is about 20 minutes. It comes pre-wired with an inline wiring harness and connectors that plugs between the rear tail light connector. The NeoLumn8 wire is routed inside the trunk lid and through 2 rubber grommets. Mounts and zip tiles are also provided. The hardest part is cutting the holes in the grommets!
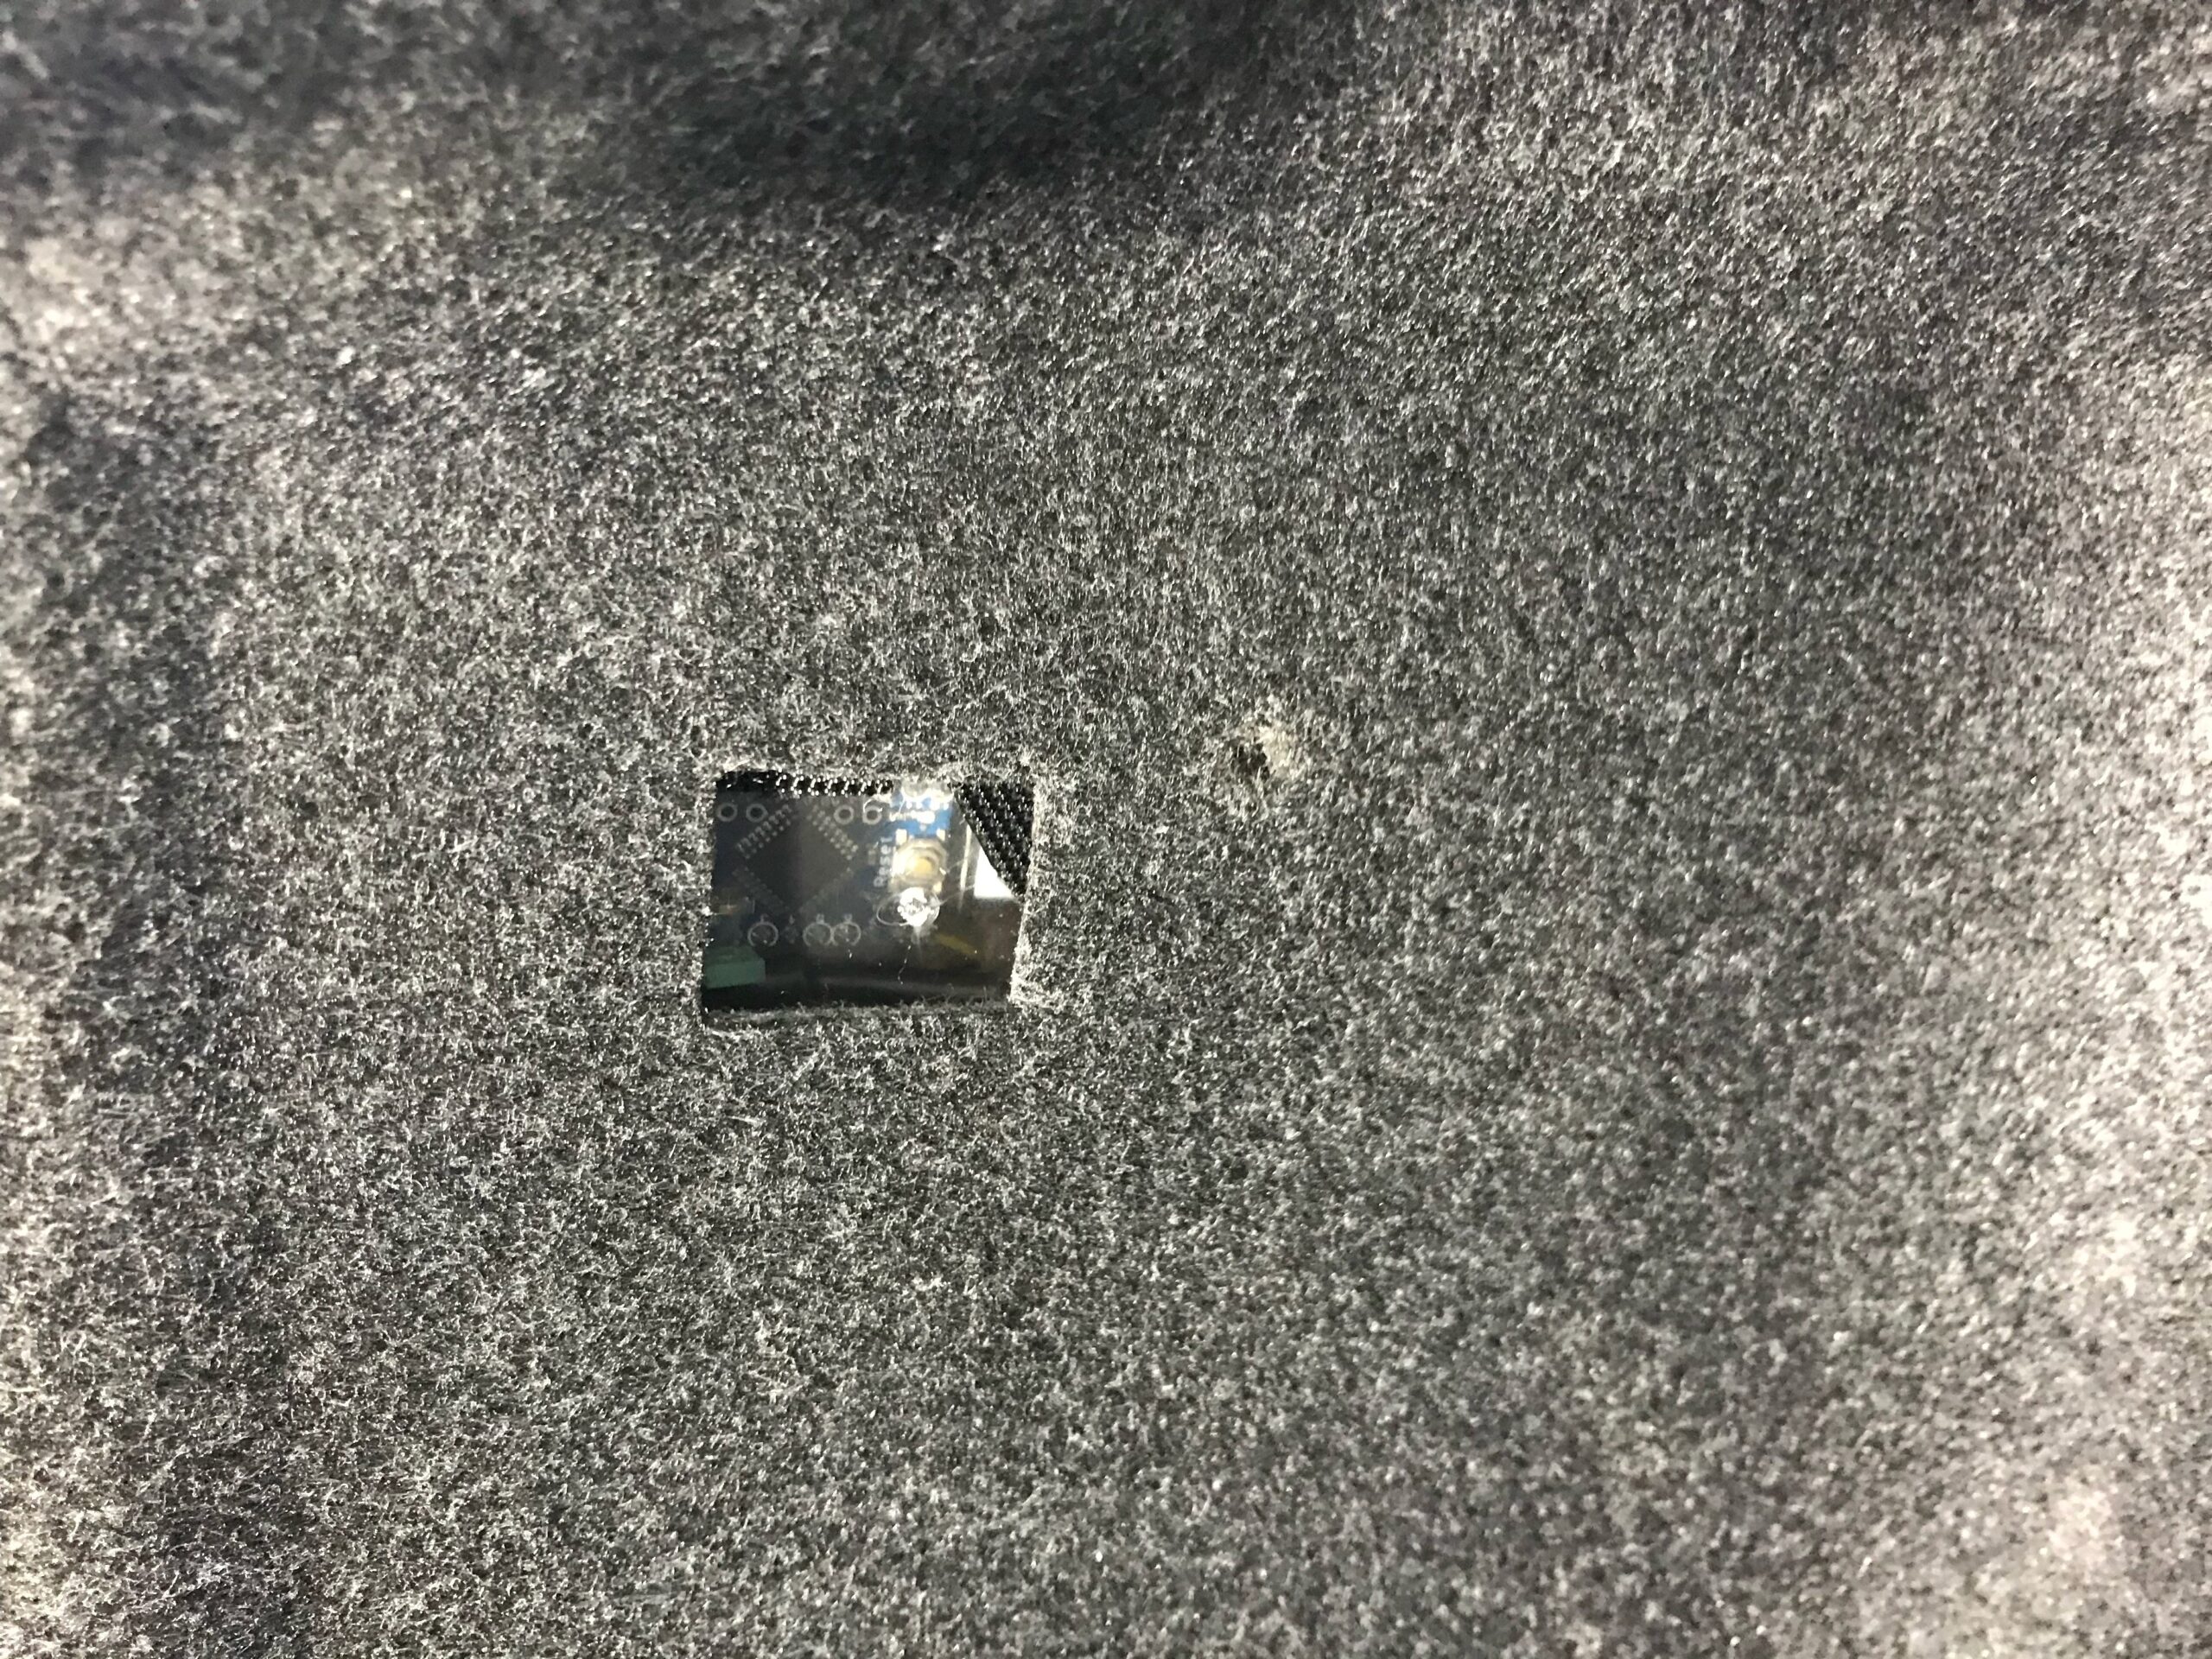
- How do I change modes? Modes are changed via the button mounted in the controller. Click the button to advance the next mode (shown on the OLED). Push and hold the button to save it. This will become the default sequence when the vehicle starts. The same can be done for changing brake modes. Where you mount the controller depends on how often you expect to change modes and how accessible you want to make the controller. You can see some of the creative installations below. One user cut a hole to access the controller/button. You may also be able to secure the controller on the top underside of the left area so it’s exposed.
- How fast does it start or “boot up”? It uses power from the running lights and starts in the last saved sequence mode. Start-up time to “play” the sequence is ~1 second. Once powered, braking is instantaneous so it lines up well with existing brake light timing.
- Is it a 3rd Brake Light Flasher? It’s a rear running light first, and has different braking modes (including flashing). Just keep in mind that sequences always play first on startup. Currently, there are 3 brake mode options including the original sweep out option.
- What about the red / brightness? I have a CRM ND2, and the red matches perfectly to the lights. It is also bright but not excessive. Your mileage may vary depending on your paint colour. One customer has a black RF and says it’s slightly washed out due to reflecting off the black before existing the trunk area. He put reflective tape to help with this.
- Is it legal? I can’t advise on legality either way, so can only share an opinion. Given sequences only run when lights come on, risk is limited. As a running light, it’s no different than any other red running light on many modern cars, or those you can get aftermarket. Playing any of the colourful sequences could draw attention – but again, that’s only when starting the car. The flashing brake modes could draw attention, but you can choose the sweep mode if there’s concern. Either way, check your local laws.
- Does it void my warranty? Don’t know really. I suggest if you are unsure, check with your local Mazda dealer.
- Is it Open Source? For reasons that are hopefully obvious, no. However, the controller can be re-programmed to whatever you want, but you do so at your own risk. Happy to guide on pins used etc. This can be done with the Arduino IDE.
- Can I control it from my phone? No. I did consider this as there are options to use Bluetooth, or ESPNow, but it can become a support nightmare, not to mention the need to build/debug/maintain apps for Apple/Google. It would also add costs. For the most part, buyers find 1-2 sequences they like and don’t mess around with it. This project took the path to keep costs limited and build a solid product that is simple and just works.
- Power Requirements: 12V power (from the running lights), 12V brake (as a signal) and GND. The controller components run at 5V and 3.3V. The unit only powers on when the running lights are on, so no need to worry about draining the battery. As long as your lights are off of course!
- Current Draw: Maximum draw is ~580mA (0.5A) when the Rainbow Dance sequence is running as it’s the most demanding sequence (uses RGB LED elements in each pixel). Normal running light mode (red running light) draw is ~146mA and rises to ~410mA during braking (red pixels all at 100% duty cycle).
- Import Duties? Possibly. I can’t tell you if, or how much, but you should assume you may have to pay import duties and local taxes. Prior to the current US administration Tariff’s (introduced Aug 2025), I hadn’t had any reports of buyers having to pay added costs. I believe this was due to the De-Minimus (grace on products < $800).
Customer Demo Videos and Installation Images

Comments: