
DominoBot NXT (ver1)
May 2006:
Update: DominoBotNXT has been enhanced. See DominoBot2.
For those who do not know about the Lego Mindstorms Developer Program (MDP), back in January of 2006 Lego was seeking assistance from the Lego community on their next generation Mindstorms product (NXT). Approx 9600 people applied to become one of the 100 MDP’s. In late February, I received an invitation to participate and of course jump at the opportunity. For a few months, the group of us were under an NDA (Non-Disclosure Agreement) where we could not talk, show or discuss anything about what we had been working on in the MPD. Now that May 1 has passed, we can now open to discuss some of what we have been up to. 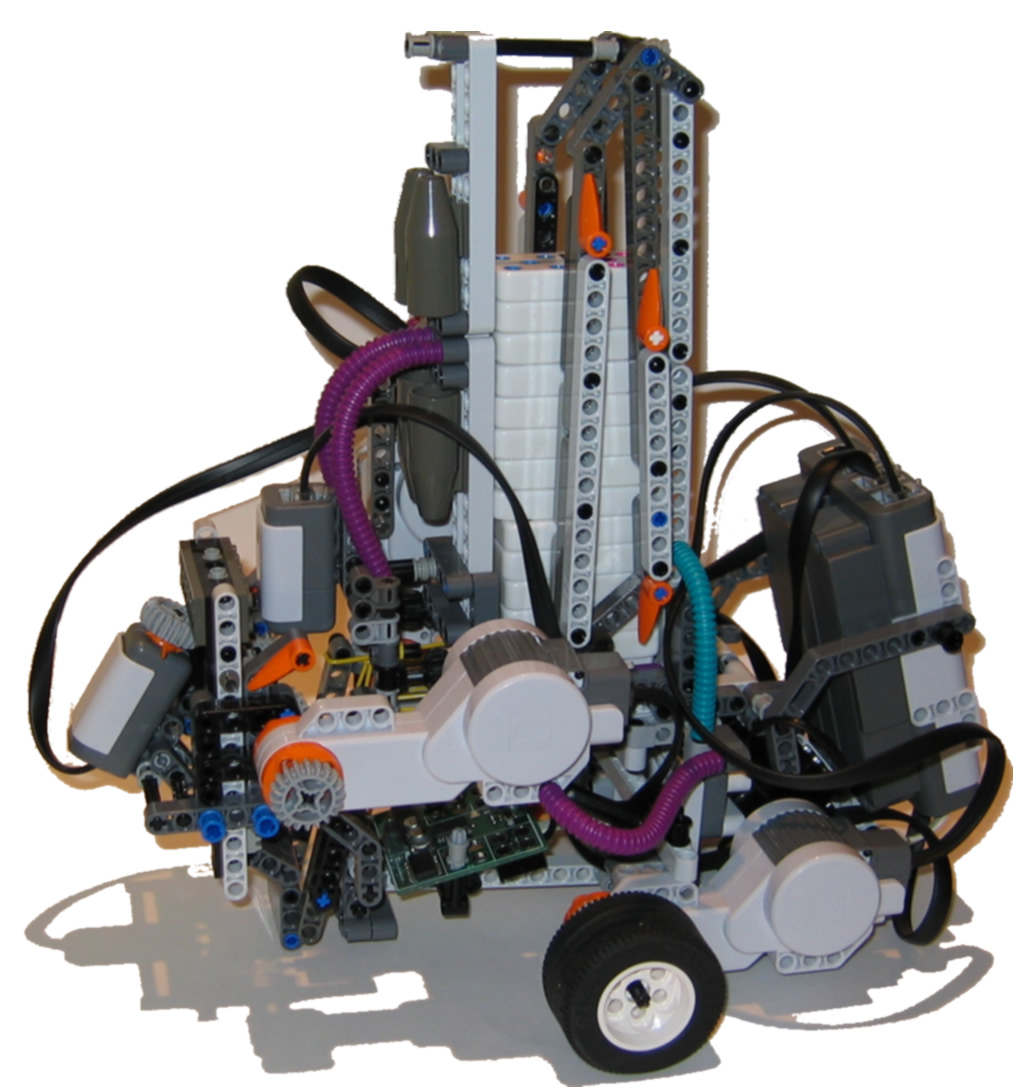
We all had an opportunity to participate in different areas of the testing/development process areas from software to Bluetooth to building robots. Initially, I wanted to get involved in more than one area, but time was limited, so I decided to focus on building only. I wanted to try and re-build my original DominoBot robot to see if I could make a better, more efficient version of it. I also wanted to test the new motors’ built-in rotation sensors – as I needed this functionality.
[ad name=”GoogleAS728x90″]
The end result – DominoBotNXT. It is faster and more agile than the others I have designed. DominoBotNXT was built to take standard 9-Dot domino’s and place them with even spacing. Currently, it only drives straight to do this, but my future plans are to add line following capabilities and potentially a different placement approach. The current approach is as follows:
drive forward >> domino falls from hopper >> light sensor is trigger >> stop, reverse (total distance forward – 70 degrees) >> lift domino holder >> move forward >> place next domino. The reason it does this is the domino placement drive mechanism is tied to the wheel drive. So as the robot moves forward, the roller places domino’s.
However, to follow a line, it will be much more difficult to move forward and then back to place each domino. Instead, the goal will be to have the domino placement on a different drive motor where they can be placed much faster while the main drive only has to perform line following. Unfortunately, I will have to wait for another light sensor and a motor multiplexer…
As with many of my projects, they are a growing, living thing. DominoBotNXT has gone through a number of iterations. Most recently, I modified the holding tower to allow for more domino’s to be stacked. The delivery mechanism was also modified to allow for faster delivery… Stay tuned, I will be using a motor multiplexer to expand the motors to allow DominoBotNXT to continuously move forward while placing the domino’s. The key being that I want to avoid reversing to place each domino…
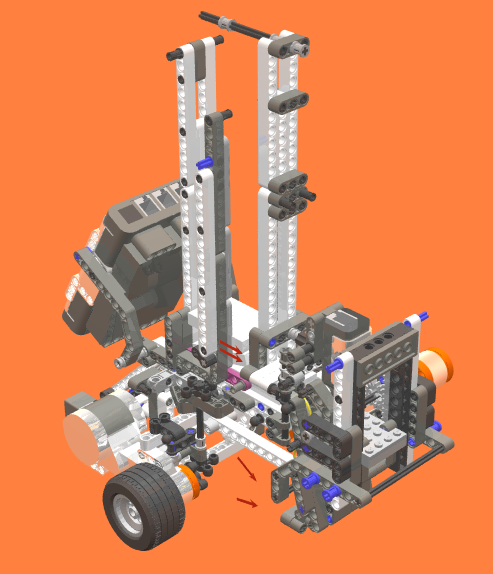
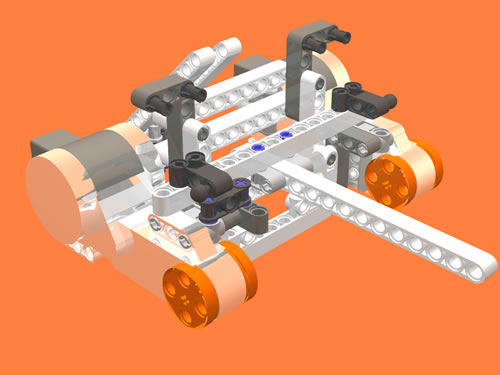
| Soon I will be including building instructions for DominoBotNXT. This pic shows an almost-complete render of DominoBotNXT using MLCAD and LPUB. The number of domino’s is limited only by the stack size. I have already doubled its height (holds 20+), but with a few more beams, it can be increased… | This render shows some of the connections on the motors. A different approach has to be taken while building with studdless beams. When I first started building this way a year of so ago, I found it limiting and difficult. Now that I have gotten used to it, I find it easier. |
|
|
|
The roller assembly delivers the domino to the be placed on the ground. It uses gravity to feed each domino (they are all stacked on top of each other) and the roller drive is connected directly to the wheels. As the robot moves forward, the pulleys pull a domino out and down the path. When the domino reaches the end (left side), it falls into a holding area. The elastics on the pulleys are perfect for this application. A combination of the stickinesss of the elastic bands, the weight of the domino stack and the reduced friction between the domino to be placed and the one above it, allow for one domino to slide out at a time. If you look at the next pic, you will see that there is a cross beam that restricts only 1 domino to the path.
[ad name=”GoogleAS728x90″] 
A close-up of the roller mechanism shows more detail on the mechanics. The drive beam and 4-tooth gear wheel are show to the left (hidden by the purple hose). This drive unit is connected to the right drive motor. The yellow elastics shown are used as guides. Since the domino’s are not standard Lego sizes, I had to build the holding and delivery components wider and use elastics and beams to guide them down the path. Only on the odd occasion, does a domino get jammed.

This is the domino holder (for lack of better words) component. When a domino comes out of the roller, it falls into place while this part holds it there. The light sensor triggers when the domino falls into place. The robot must track backwards after a domino is placed in order to line it up and get it close to the previously placed domino. This is necessary as the delivery component is directly attached to the drive wheels. The robot must drive much further forward to place a domino than the space required between each.
A light sensor is used to detect when a domino has fallen into the holder. A simple bit of math has the robot moving backward Total Degrees Fwd – 70 Degrees. This is enought to place each domino within range of the previous. Once I can get a hold of a motor multiplexer and an additional motor, I plan on having the domino delivery driven seperatly. This will allow for the dominos to be placed independent of the drive motors and not require the robot to back up each time a domino is placed.

![]()
Rate This Post: 

 (3 votes, average: 3.67 out of 5)
![]() Loading...
Loading...


Comments: