
Lepin Baja Trophy Truck (23013) Build / Lepin vs LEGO Comparison

Let’s start by clearing the air. I’m fully aware of what Lepin is up to. I’m an AFOL and have been a dedicated LEGO fan (mostly Technic and Minstorms) for over 40 years. I have spent more $ on LEGO than I want to know. Am I a purist? Somewhat. I didn’t really pay much attention to knock-off LEGO brands as I just assumed they were crap, so I ignored all the media about them. Only recently did I start reading about Lepin and others out there making LEGO knock-off’s. My curiosity got the better of me. Namely Lepin due to claims of good quality as it compares to LEGO. I wanted to see for myself, so I picked up my first Lepin set – the 23013 Trophy Truck.
It’s widely known that Lepin is stealing LEGO IP, and less widely known they are doing it with AFOL member creations as well (such as this truck – who’s true IP goes to Madoca1977). The purpose of this post is not to promote nor condemn Lepin (there are enough people out there doing both of these already). Instead, I hope to both learn myself and educate those on either side of the fence.
LEGO is expensive, but you have to keep in mind what drives that. Years of R&D has gone into perfecting the “brick” and the high tolerances LEGO has made themselves famous for. I have parts from 40 years ago that still mate perfectly to the newer pieces. Also, if you have ever had to use LEGO’s customer service, you’ll see they are top notch. I just used them yesterday with a quick positive outcome. LEGO understands customer service and does this very well.
Lepin provides LEGO sets (and some MOCs) for a fraction of the price of LEGO. After building this truck, they do this with considerable quality – I can’t lie. LEGO does not sell a Trophy Truck, but a quick inventory search on Bricklink tags it at $400-$600 (CAD) if you bought the bits separately. The Lepin set can be had for $215 CAD shipped (DHL 3 days from China). For many around the world who cannot afford LEGO, Lepin becomes an easy choice. However, for some it’s a moral question. This write-up is broken down into 2 sections. First a comparison of Lepin parts to their LEGO counterparts. Second, I’ll provide observations from the Trophy Truck build.
What’s in the Box:
- 2314 pieces
- 2x 2.4GHz Transmitters (needs 3x AAA batteries each)
- 2x 2.4Ghz Receivers
- 2x battery boxes (needs 6x AAA batteries each)
- 4x Motors (LEGO L-Motor copy)
- 1x Steering Motor (not proportional) (LEGO Servo Motor copy)
- 2x sets of LED lights

Section 1: Comparison of Lepin vs LEGO Components
It’s very difficult to tell the difference between most Lepin parts. Usually LEGO has a tiny logo stamped on the part and/or a part#. Lepin may have a part #, but does not use LEGO’s logo. Motors are very close in look and feel (Lepin uses white at the back of the M-Motors to secure the cable). The Lepin battery box is noticeably different from the LEGO one. The Servo motors are nearly identical and very hard to tell the difference. I had to keep ensuring I put them down in a specific spot so I knew which was which. The key difference is LEGO has it’s logo and part# marked on the underside. LEGO also has a larger logo stamped on the back. Lepin has none of these.
Electronics (PF Components):
This is one area where I am both impressed (with Lepin) and unimpressed. The most impressive part is they stepped up the game using 2.4 GHz wireless. Anyone who has LEGO Power Functions will know what a pain their line-of-sight IR-based Power Functions system is. (Good to hear this may change Q2 2018!) I am less impressed overall with the build quality, obvious use of lower quality motors and electronics.
- Transmitter: Looks nearly identical as the LEGO unit with the difference being that it has a white bottom plate. The Dark front window is simply there to match the LEGO PF remote looks, but it serves no purpose given it’s a 2.4GHz system and only houses the antenna wire (see pics). For the untrained eye, that green LED is simply to indicate the device is transmitting – it’s not an IR LED. The screw to remove the battery cover is cheap and like other cheap screws that feel like they are made of Aluminum and the head easily strips out over time – so be careful there. What stands to be tested is how efficient the 2.4GHz system is and whether it eats batteries faster than the LEGO PF IR. One note to point out is that the Lepin Tx units require fresh batteries. I was looking to use some AAA units that were run down a bit and the Tx would not work. Fresh batteries are 1.5V each (total 4.5V). I was trying to use 2x 1.3V + 1x 1.5V (total 4.1V) and the Tx would not function.

- Tx Range: I have to give it to Lepin for stepping up the game here and beating LEGO to the game by using 2.4GHz. I’ll provide more on range after I build the truck.
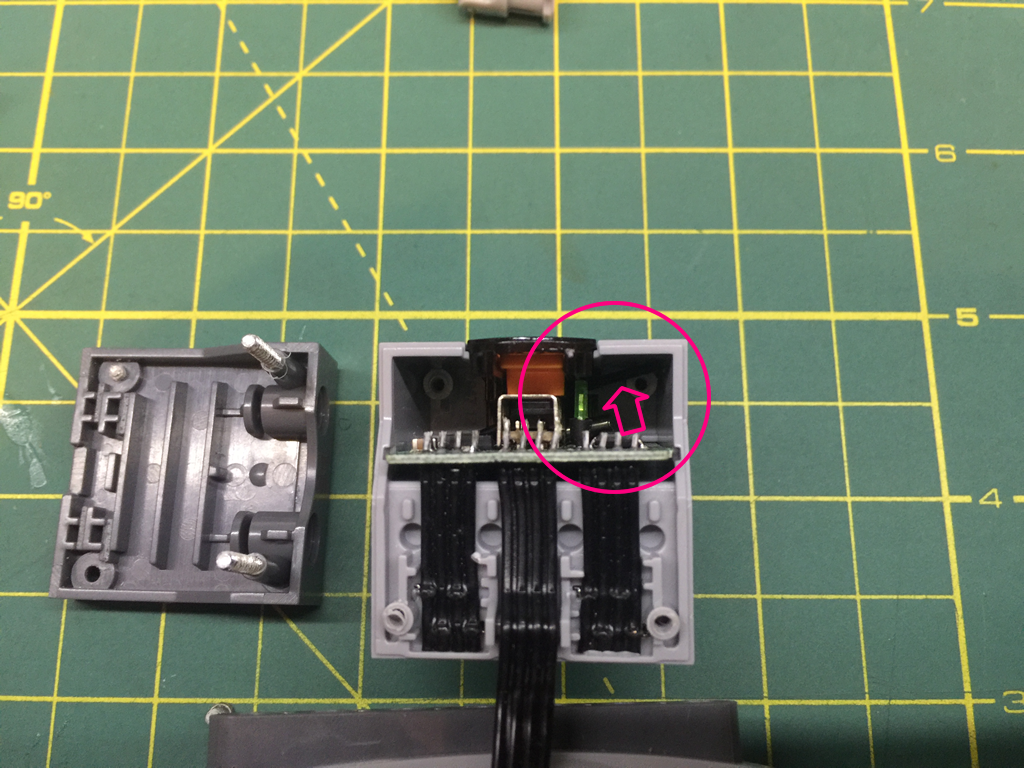
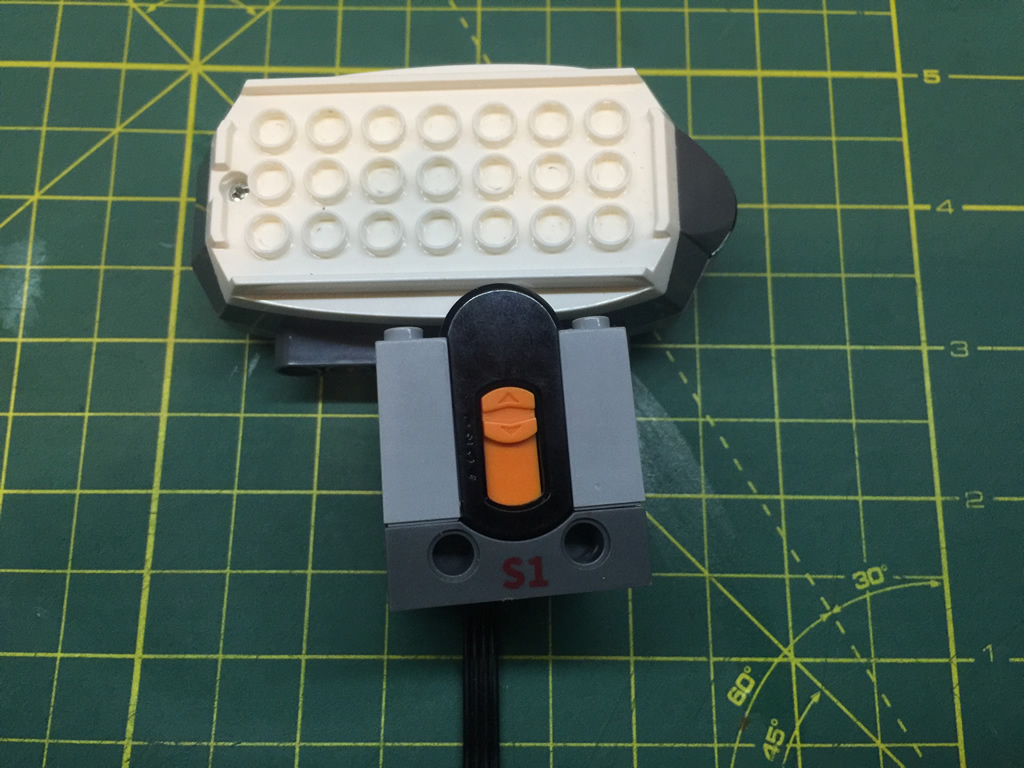
- Receiver: The front of the unit has “S1” printed – probably to ID some sort of version. I took apart the receiver to show the innards. Not much excitement other than you can (barely) see the black antenna wire (top right inside the box). For my unit, it looks like Lepin stripped one of the shorter screws to the front of the unit during assembly. Good thing this is not meant to be taken apart. 😉 I didn’t take a close look, but I assume that Lepin are using knock-off IC’s and components as well. With my experience in electronics, this typically has yielded less efficient battery usage and shorter part life. These days however, most electronics are made in China and contain a mashup of components – so you never know what you are truly getting. Even big names have later discovered they were duped and had counterfeit components in their devices…
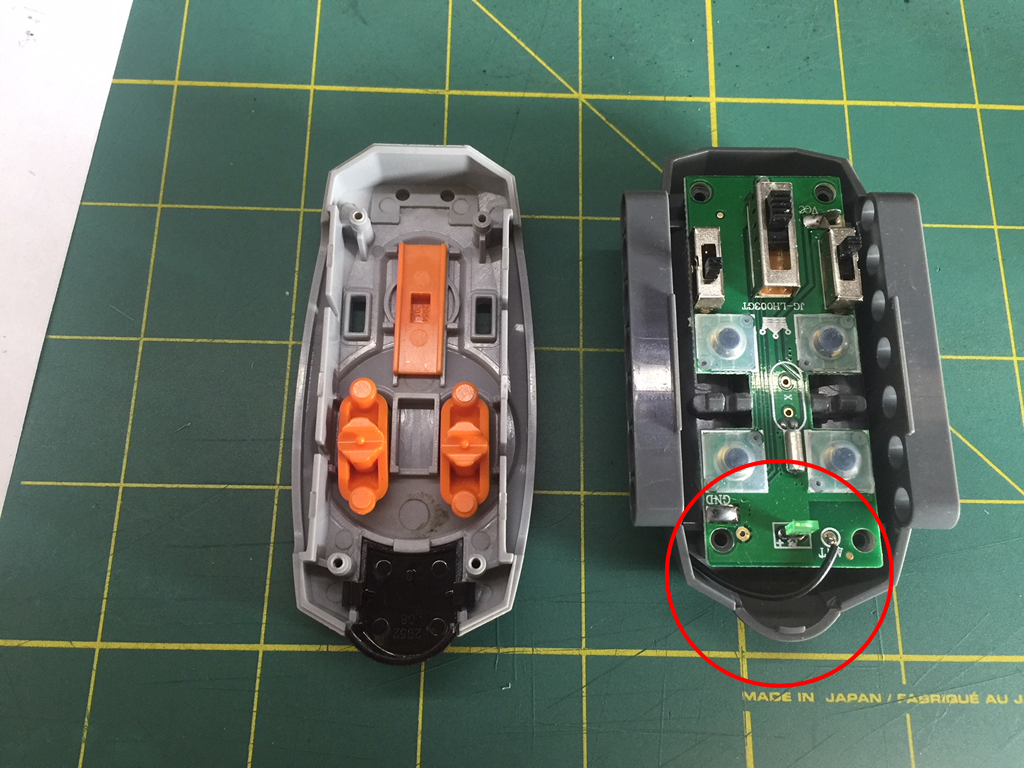
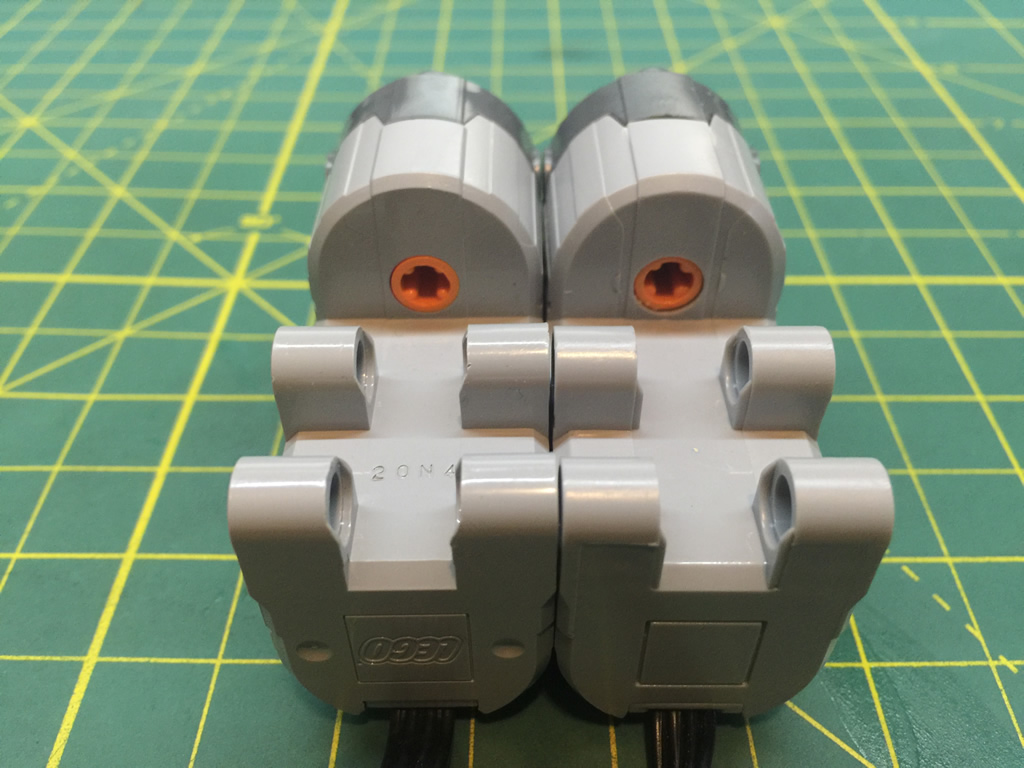
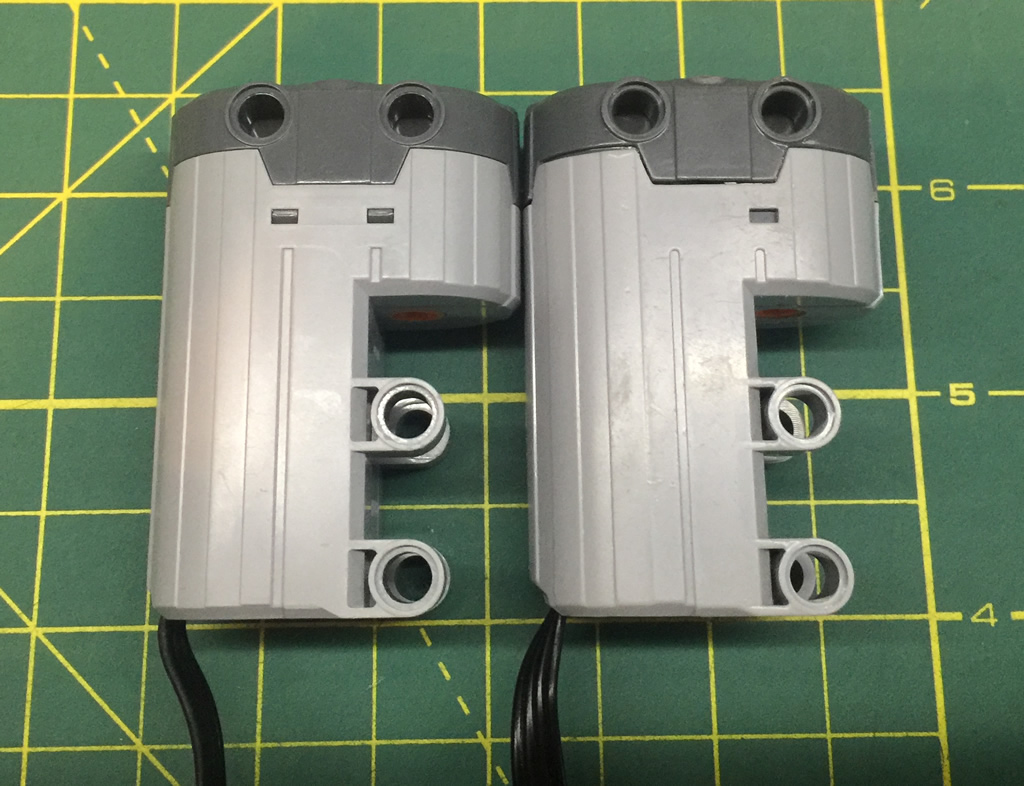
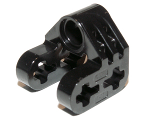
- Steering Motor – It’s not proportional, so not a Servo like the LEGO unit. It’s essentially a motor with stops built-in for each end of the rotation. Remember those cheap little RC cars where the steering was either left or right? Yep – this is all you get from the Lepin steering motor. I verified this by testing both LEGO and Lepin units using the LEGO speed remote (more on this further down). Here’s a comparison between the LEGO (left) and Lepin (right) Servo motors. Note the LEGO logo at the back, and the part # writing on the LEGO unit. Looking for the side, one can easily be duped. Lepin’s unit also had a gap where the DBG and Gray segments joined.
- L Motors: Nothing really special here. They are very similar looking but the Lepin units have a white piece where the wire goes into the housing. Lepin are noticeably louder than the LEGO units.
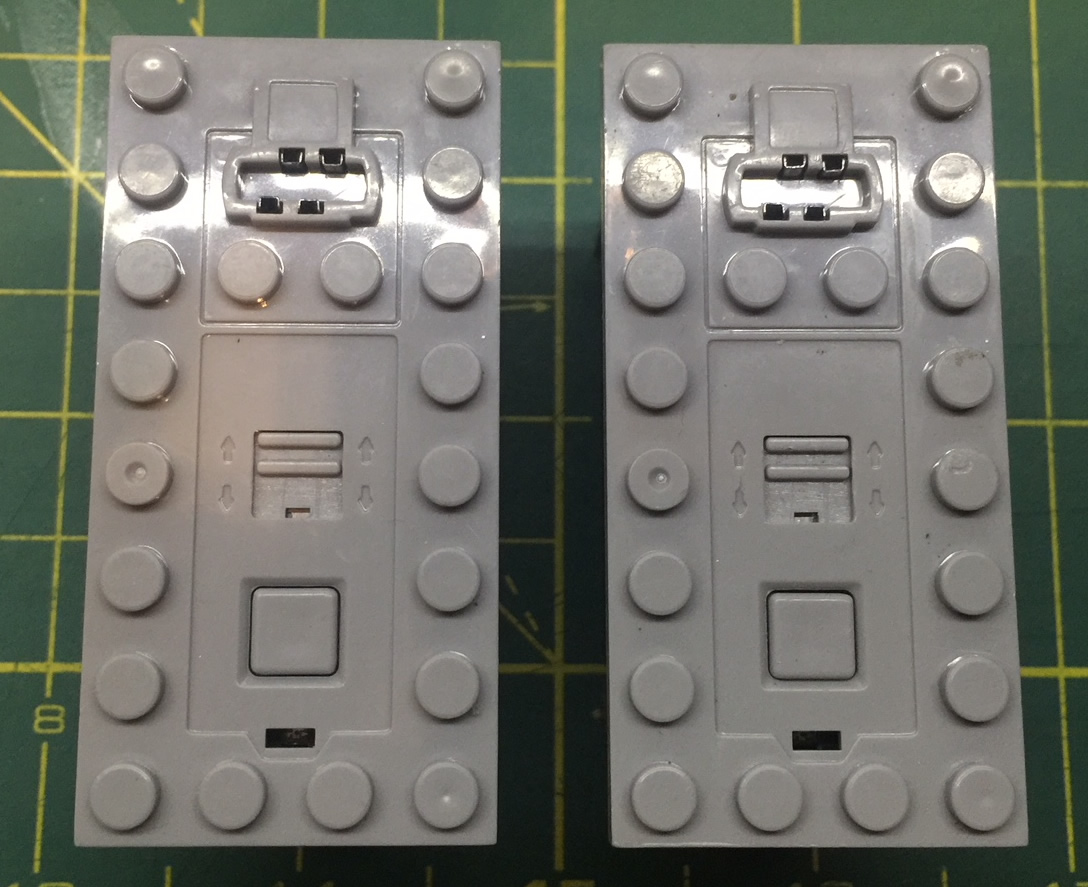
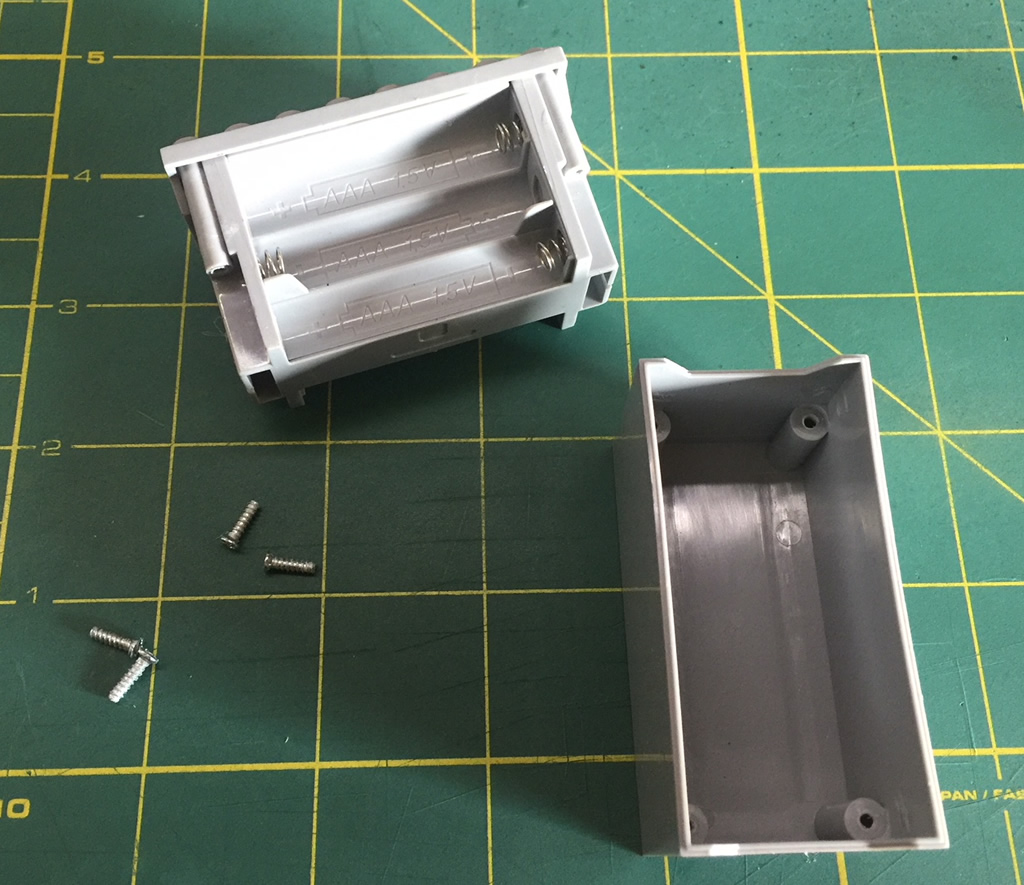
- Battery Box: – The battery box is not the same as you see on the sales adverts. Lepin and resellers cheat by typically showing the LEGO LiPo battery box (orange dial) in pictures. Instead, all parts are gray. There a power and direction switch on top. The unit takes 6 AAA batteries and you need to remove 4x screws to change batteries. Quality is not the same as LEGO and the screws feel like they will strip the plastic if you are not careful with them. There is also a common thread with use of cheap Chinese screws (you know those ones you always strip their heads after one use?) It’s as if they are made of Aluminum. Yep – they use these all around their motor and power components.
 |
 |
LEGO Power Functions Compatibility:
***WARNING*** While testing the LEGO Servo motor using the Lepin Rx/battery box, I think the Lepin Rx fried the LEGO Servo Motor. It still functions on the Lepin setup, but will no longer will work with LEGO PF. Not even directly connected to LEGO’s LiPo battery box. Going to do some more testing to see what’s going on there.
I tested a LEGO Servo Motor and M-Motor using the Lepin Battery and Receiver. Both worked. However, as noted earlier the Lepin system does not support proportional (PWM) for the Servo Motor, so it was either -90 or +90 degrees. That said, the LEGO servo functions the same when connected with the remote shown in the video. Where things differ is LEGO has the Speed Remote that PWM’s the LEGO servo motor so you get incremental changes (I think it’s +/- 7) from -90 to 0 to +90. I decided to try the Lepin Steering (servo) motor to the LEGO PF system using the Speed Remote (64227) and it behaved erratically. It did not increment as expected. Instead it chattered and seemed to jump toward either end of +/- 90 degrees.
One thought I had was whether the Lepin servo electronics were setup differently given it functions on a 2.4GHz system. My assumption currently is this should not matter given the use of RF is only between the Tx (remote) and Rx (receiver) and the Rx should translate that info to proper PWM motor controls for either motor (LEGO or Lepin). However, there could be some differences there that I am not aware of.
For those that are curious, it is possible to use the Lepin 2.4GHz remote/transmitter with LEGO PF motors. See video below. However, make note of the warning I have provided above. I am not sure if the Lepin system fried my LEGO servo motor, or if it was already damaged prior.
https://youtu.be/dpWhB7efLWA
Building Instructions: They were lazily packaged and came damaged. Well laid out with clear indicators using yellow outline where new parts are being placed. One Lepin was consistent at was not showing some pointers (arrows) where specific parts would go. That said, you can tell that they attempted to try to be as detailed as possible. I find Lepin instructions much like what I was used to in the early days of LEGO Technic instructions – with more parts being put together per step.

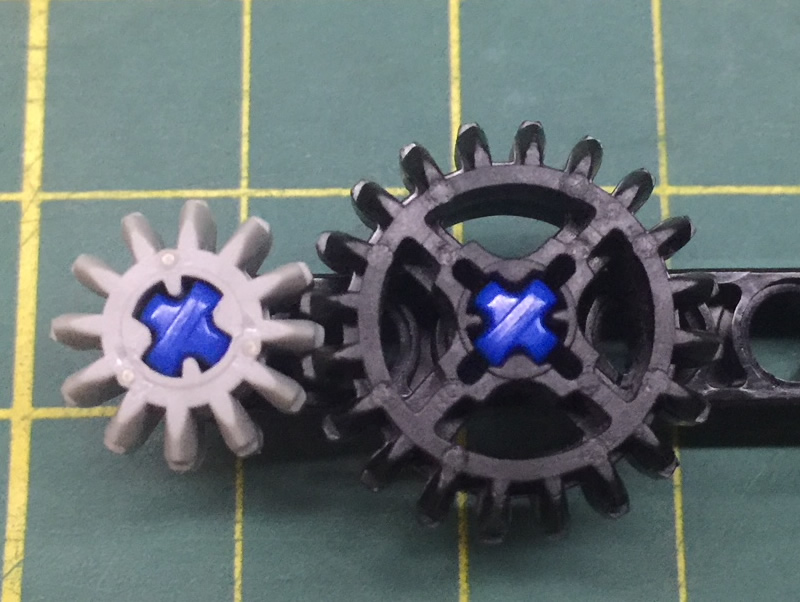
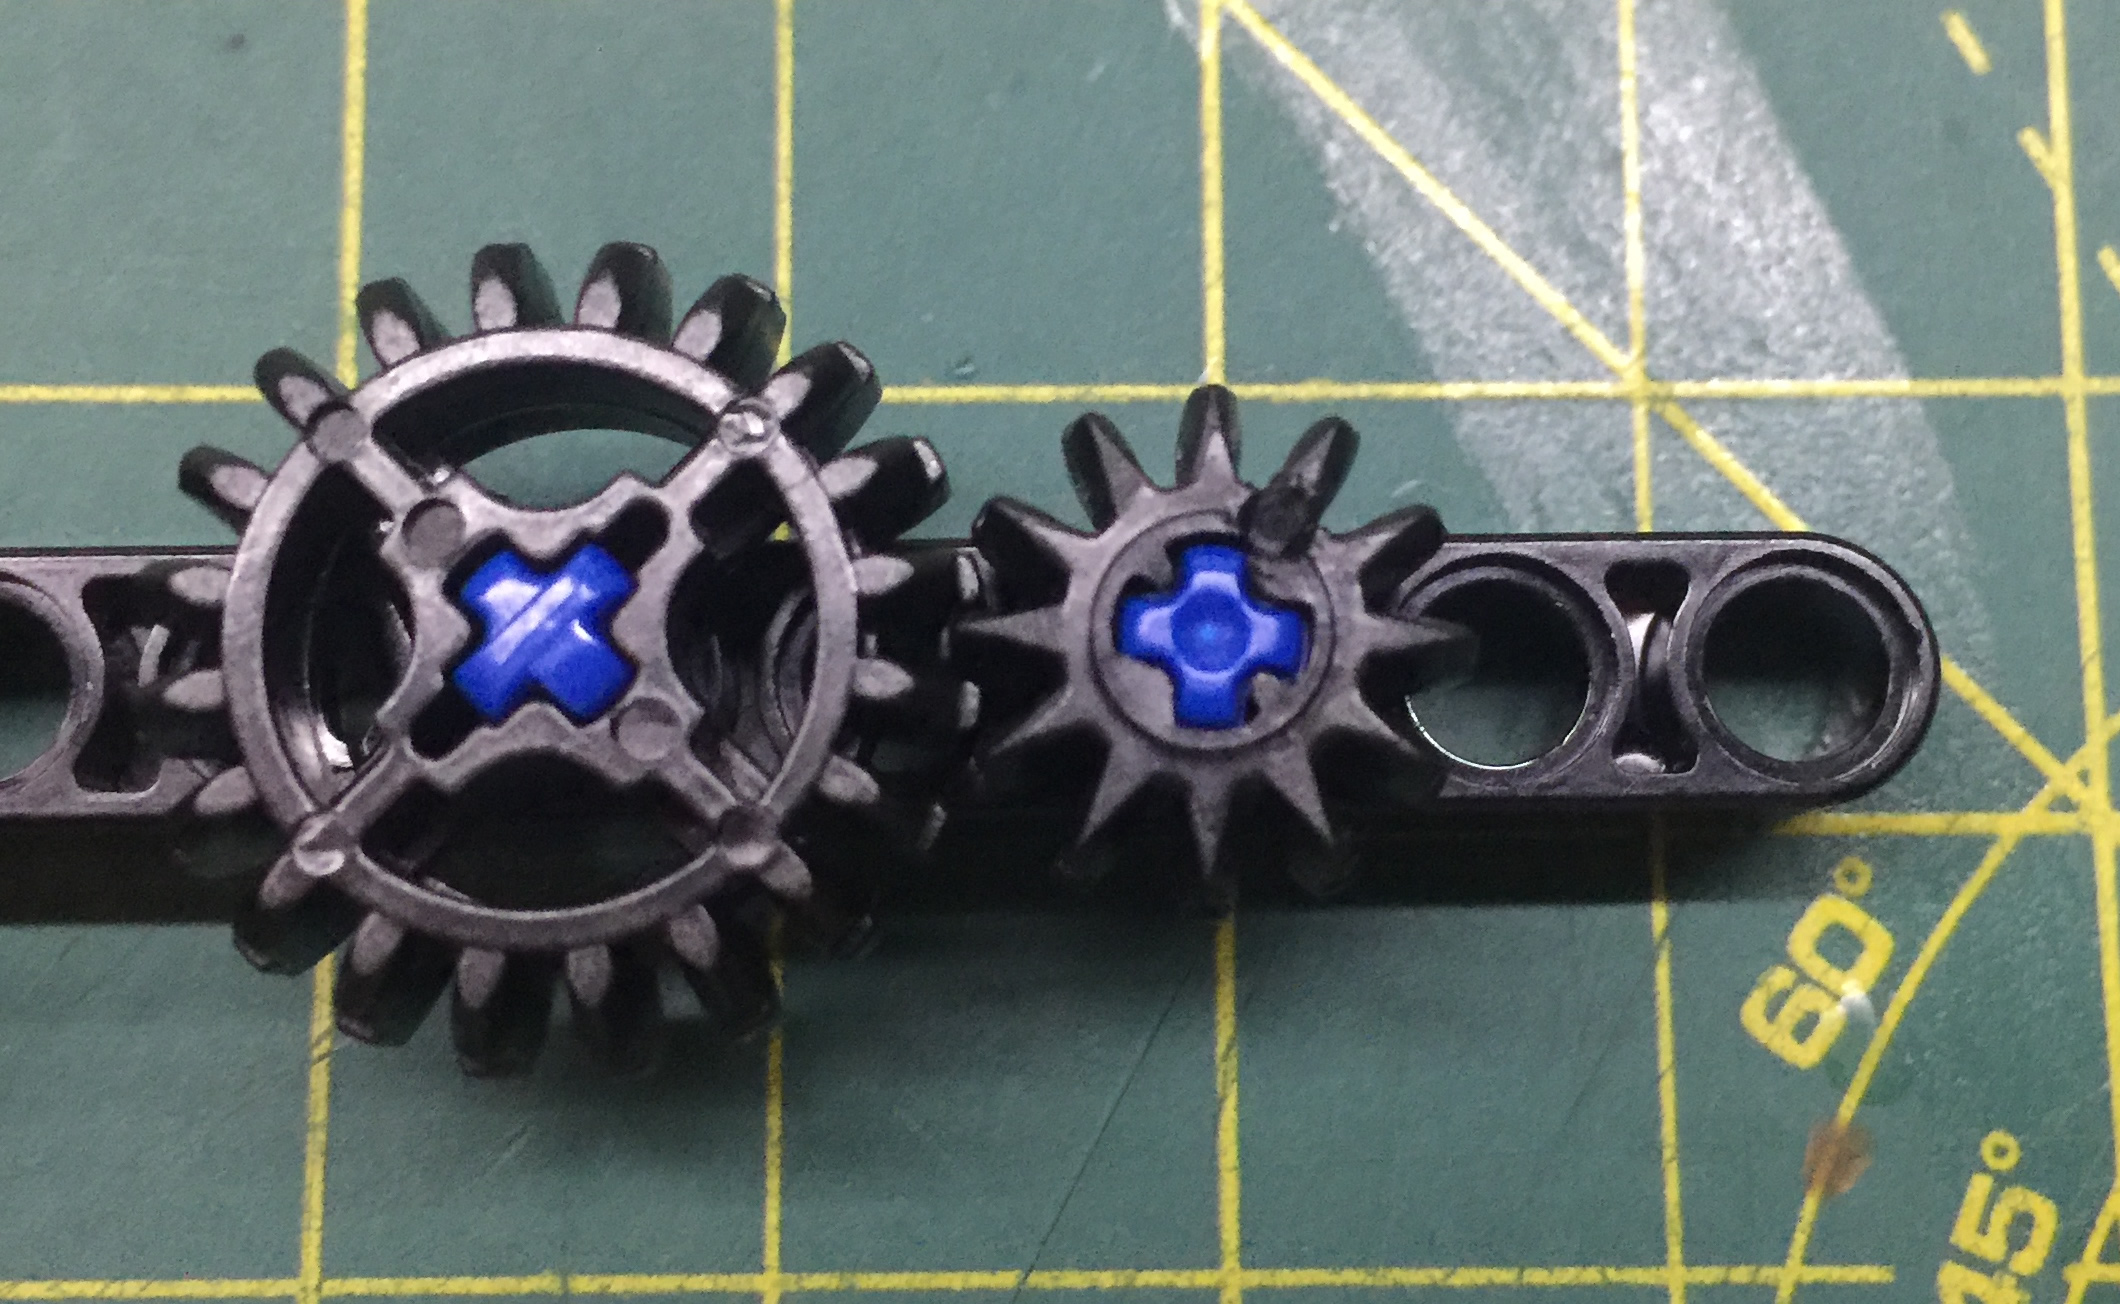
Gear Mesh:
- Gear mesh between LEGO and Lepin are similar, but under close inspection I found that LEGO gears are a better fit. It’s hard to tell by the pictures below, but the LEGO ones are about 1mm closer to each other. Under torque situations, I could see the Lepin gears slipping more easily. Let’s see if this holds after the 23013 build (below)
| LEGO Gears | Lepin Gears |
 |
 |
Part Comparison:
- LEGO quality stands out with consistent mating/friction/smoothness that Lepin struggles to re-create. That said, I have to admin, I’m impressed with the tolerance Lepin is getting and would tag it at a 9 out of 10. I’m seeing two trends. The first is gears tend to fit tight on axles (I like this). The second is friction pins don’t have that “finishing snap” feeling when you click them into holes. They fit snug, but don’t have that feeling that they won’t rattle out over time.
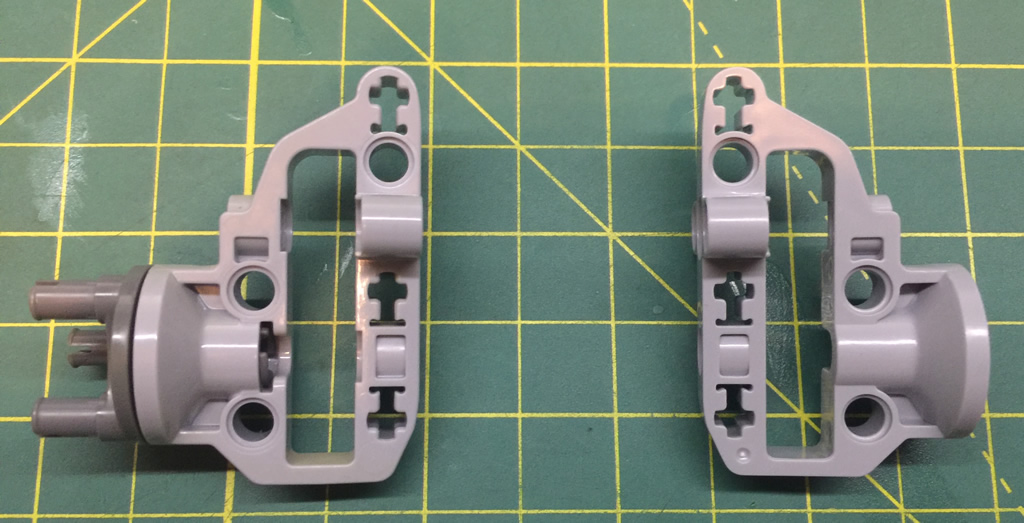
- Lepin part replication is impressive. Using the steering portals as an example – LEGO on the left, Lepin on the right. To an untrained, eye you would not be able to notice a difference between the two. Even the feel of the wheel hub (friction/fit) feels the same. The only real difference is the LEGO logo and part#’s stamped on the parts. Lepin does not tend to stamp a logo, and their part #’s differ. Note to self – this is going to make me look a little closer when buying from Bricklink.
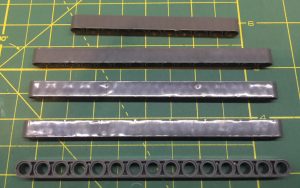
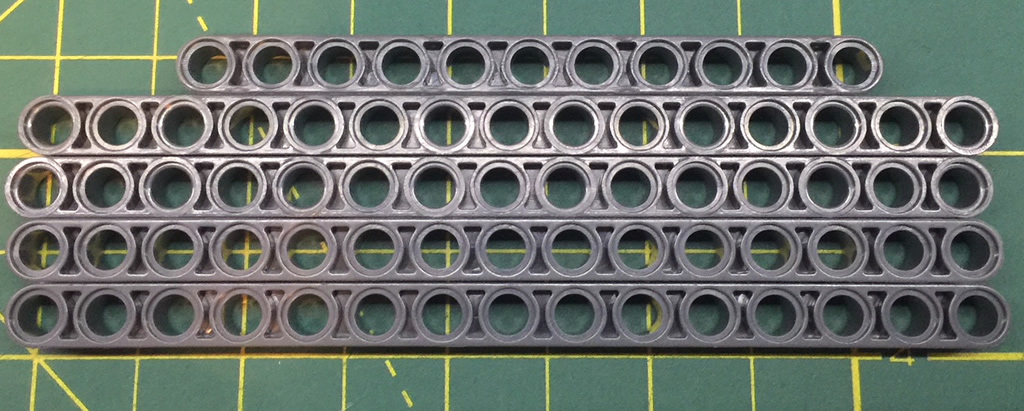
Notable Items:
- Lepin beams had lower quality than LEGO. A few came that had dings and malformations on them that make them look like they are used. There are also more notable flaws likely due to the molding / heating / cooling process. On a positive note, the Lepin beams were perfectly straight as is their LEGO counterparts. In recent years, I have had some LEGO beams show similar flaws which made me question their quality somewhat as well. It’s also coincident that LEGO moved some of their manufacturing to places like Hungary, Mexico and even China.
 |
 |
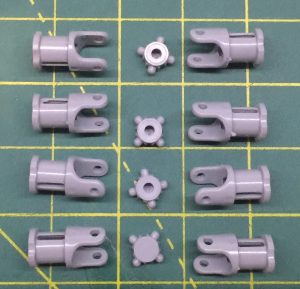
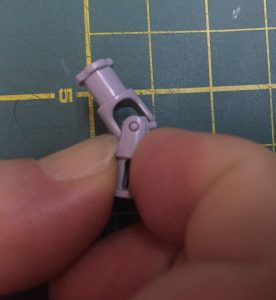
- Universal Joints come in pieces and you have to put them together yourself. I suppose this is a cost saving measure on Lepin’s part. It would be interesting to see what machinery LEGO has to put these suckers together. That said, it’s easily done with a set of pliers to get the hub on the first side, then using your fingernails, hold one side and flex the other part of the joint over the nub with your other fingernail backing the nub to keep it from shifting.
 |
 |
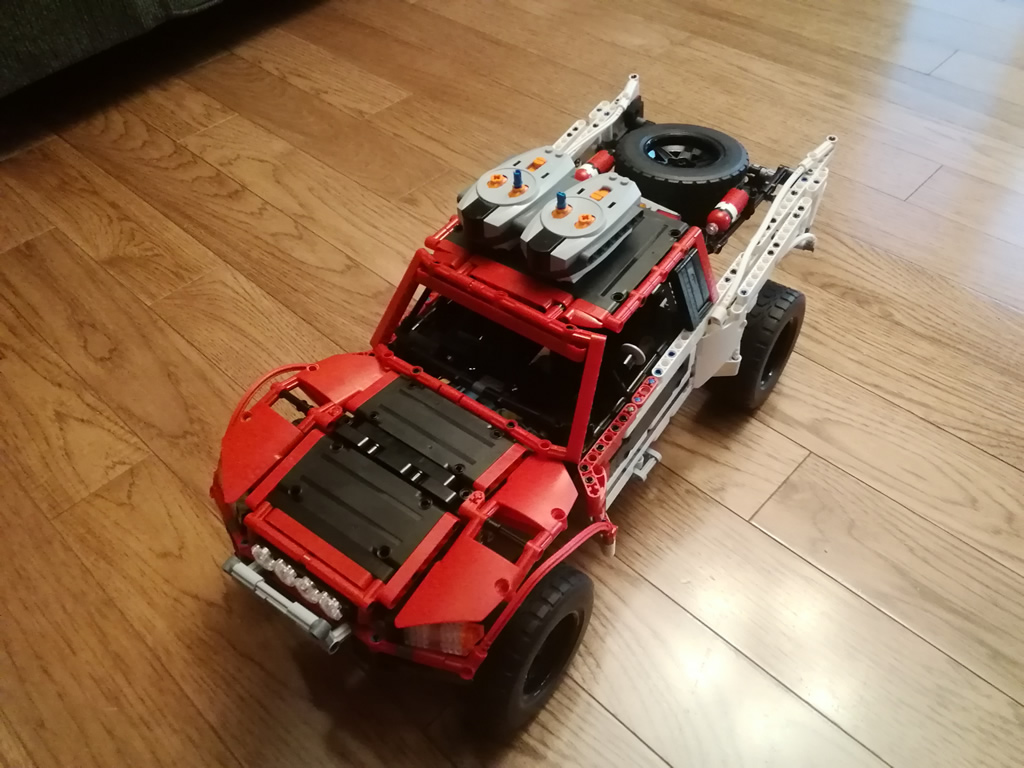
Section 2: Lepin 23013 Build
I managed to put the set together over the course of a few weeks. It’s now complete and I have to say, I’m not really satisfied. Nor am I surprised as I did not have high expectations. Here’s a list of issues I encountered.
Fit: Friction pin fit is not as precise or consistent as LEGO. They feel very similar but dont have that final ‘click’ as they snap in. There were some pins that were tighter than others. Where I noticed the biggest difference was axle fit on non-gear parts. Particularly those that would have some friction such as this part where an axle would fit through the cross part. Pretty lame sums it up. Many pieces easily slide along the axles, so tolerances are not hot there. In many cases, this has caused pieces to come loose if you flex the truck while moving it. I also had some cases where some parts got tighter as they slid into their endpoint, so much so that I am not sure they will come apart. More in this below.
Fails:
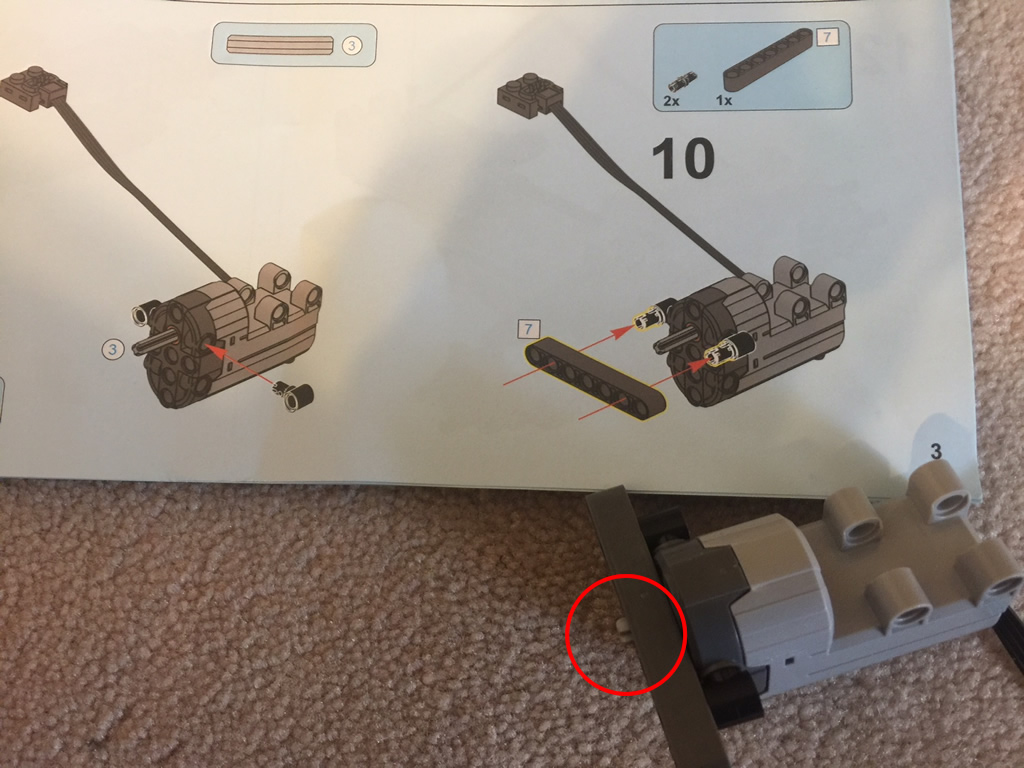
Fail 1 – Step 10 – Servo axle slot is deeper than LEGO. Results in #3 axle going in too deep during step which leaves it with nothing sticking out when the 7L beam is inserted over top. The axle went in snugly but took a lot of effort to get it back out. I almost needed pliers.
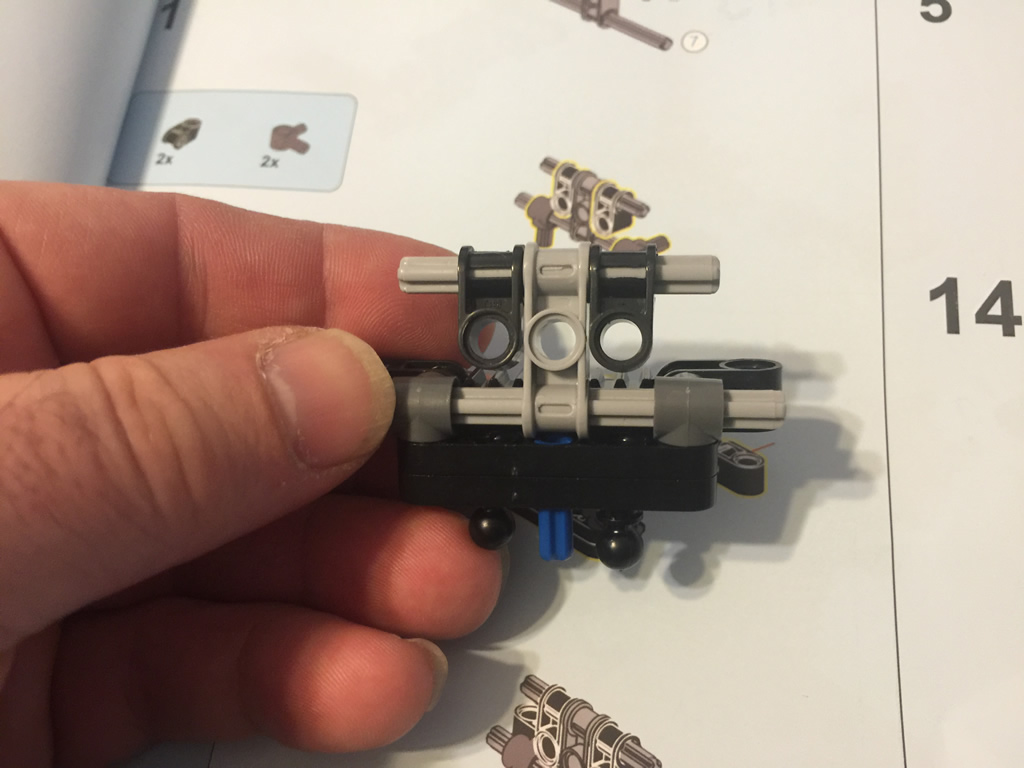
Fail 2 – Step 5 – The black steering arm ball socket came broken on arrival. Discovered it after I noticed it did not have the same ‘snap’ feeling as the other one. Let’s see what sort of luck I have getting this replaced!

Fail 3 – Step 5 – While putting together the steering mechanism, there is friction between the 2 black 5L 1/2W beams and gray sliding unit. As the steerer unit slides side-to-side, it clicks as it catches along the way. I did some testing and the steering motor seems to handle this alright, but it’s not something LEGO would let slide by.
Fail 4 – Not a biggie, but they missing showing the CV part and placement between the ball units. 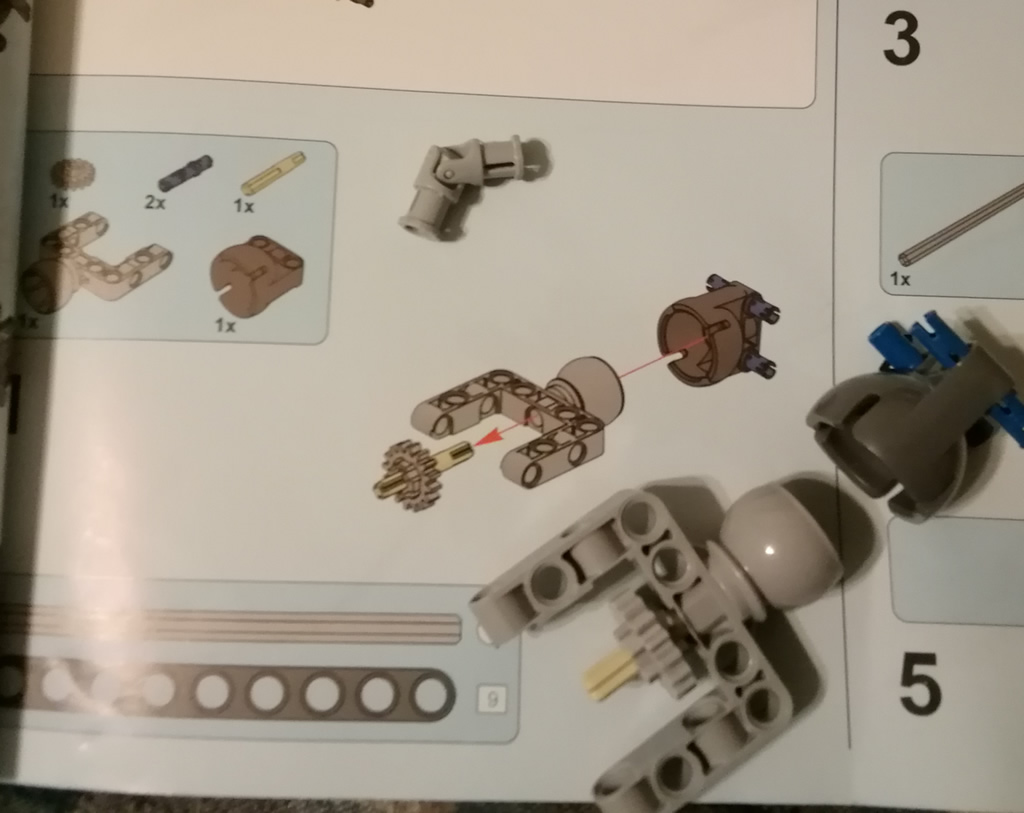
Fail 5 – Below is an example of parts that went in snug and feel like they will never come apart again. In this case, I had made a mistake and had to remove the parts. They were so tight that they snapped when I tried to pry them apart. During the course of the build, I figure there are 20 part pairs that will snap if I ever try to take them apart. A Lepin QA fail big time here. I have never seen LEGO parts do this.
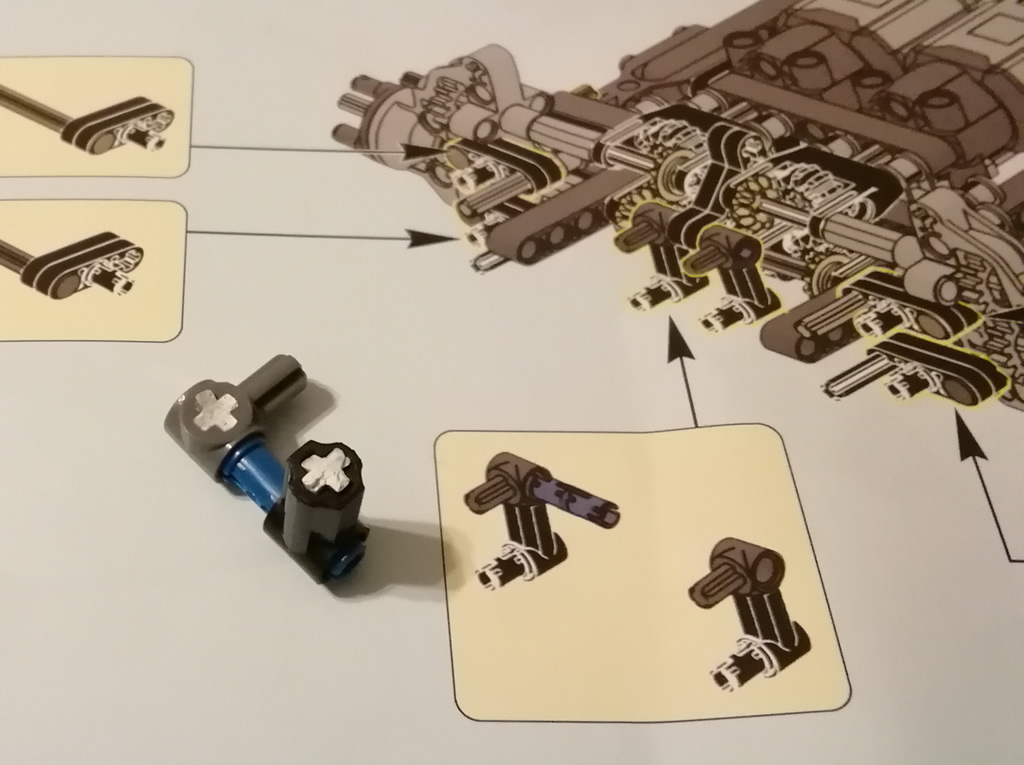
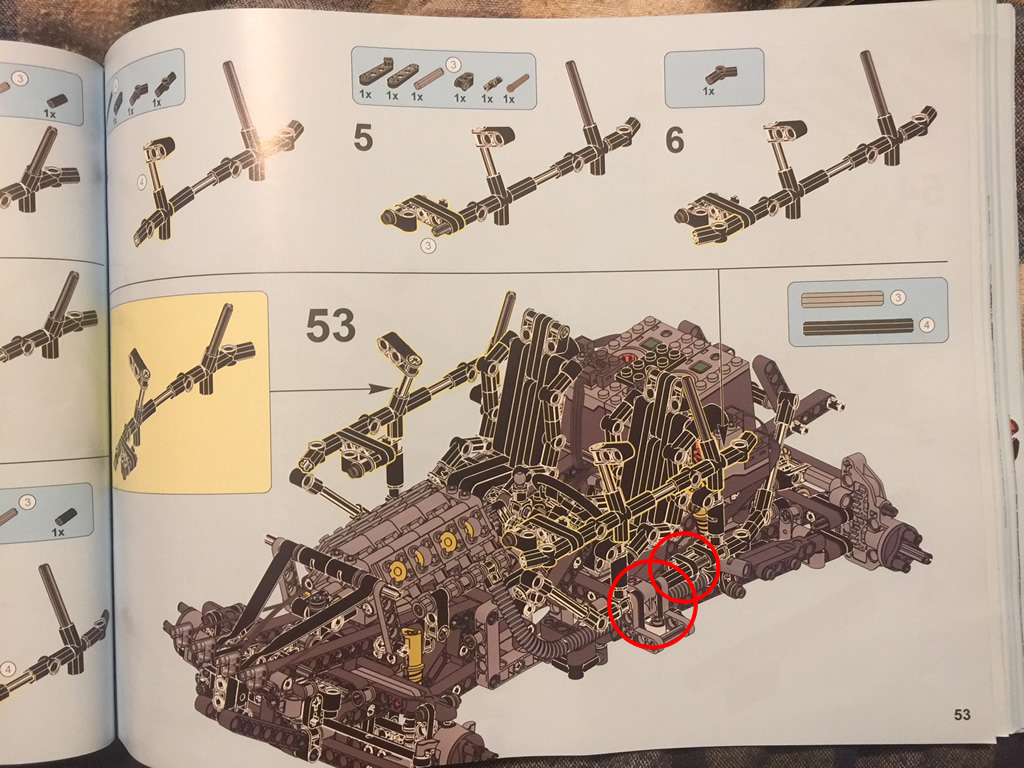
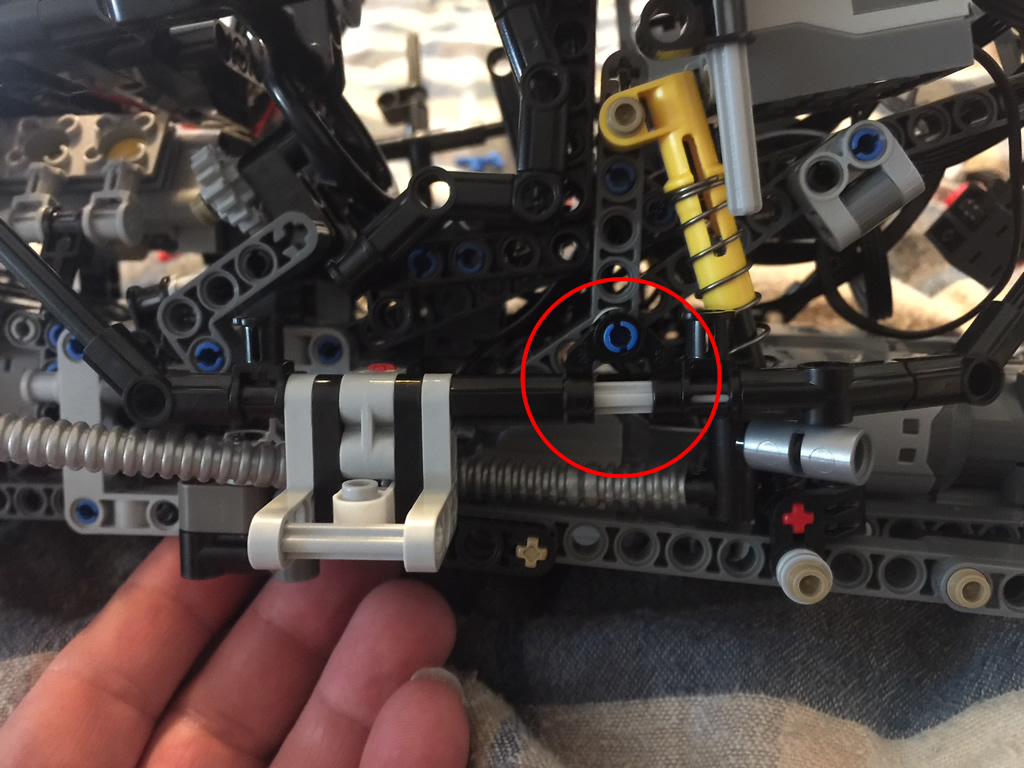
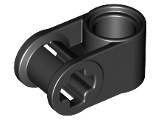
Fail 6 – This was by far the most painful part of this build and biggest fail of all. So much so, that it has compromised the strength of the roll cage and both side body panels. You essentially can’t pick this thing up by any other part other than under the chassis. It’s hard to describe it but the side roll cage units did not line up at all with how the instructions described them and I had to modify the approach to get it to work. Even with doing this, the lower roll cage bits do not connect to the upper roll cage units anymore. I tried to see if I messed up a step but could not find any after reviewing many times. I remain stumped on this. I managed to fix the lower section by flipping the Axle and Pin Connector. However, the upper roll cage still does not line up and this is critical as it holds the body panels on. I also had to switch out this connector with a 3L version from my LEGO collection (shown on prev page instructions below). This at least allowed for the body panels to be mounted. The end result is a loose roll cage that is not connected from top to bottom and weak feeling body panels. (If you have this set, and did not have this challenge, drop a comment below)
| Original Build | Modified – Flipped Axle and Pin Connector |
 |
 |
Fail 6 – Batteries/Motor/ Power – after completing it, I connected up the PF cables and battery boxes to have a go at it. Both Tx and battery boxes had a fresh set of batteries put in. Given this has 4 motors driving the back wheels, I am under-impressed. Originally, I had all 4 motors being powered by 1 battery box and this was a total fail as it barely moved. After moving 2 motors over to the other receiver/battery and bridging the remotes, this brought more power to the truck. The issue is that it still struggles even going over carpet, so I doubt this will be any fun outside if you plan on hitting any sort of dirt.
Fail 7 – Missing parts. In all, I was surprised there were not more, but I ended up having about 6 missing parts which I supplemented by using LEGO (made me feel dirty!) LOL.
General Building Instructions Comments:
- Fewer steps with more parts for each.
- Lepin skip some pointers/helpers that LEGO typically has. I’ve been building for over 40 years, so I tend to skim the step details quickly. With these instructions, I found myself having to look closely at not only the parts lists but also the step pictures as sometimes they are vague about a part placement location on the final model.
So, there you have it. After 40+ years with LEGO, I decided to see if the grass is greener on the other side. From a part look and feel standpoint, I was very impressed. The thought crossed my mind that maybe Lepin managed to steel LEGO’s dies or CAD files to mill their own as I cannot see how they managed to get so close to LEGO quality. If you had this set and it’s LEGO equivalent side-by-side, you could not tell the difference. I could deal with the odd part being tight / loose, but the combination of the many loose parts makes me feel like this model will fall apart the first time I take it over some bumps outside. A LEGO Technic model would not do this and is designed to take some punishment. I can deal with the missing pieces as I have a huge inventory, but if this were someone’s first set, it would be a real letdown to have to wait 1-2 months for replacements to be shipped from overseas. I was most disappointed to see the roll cage unit construction steps fail. I spent a long time trying to see if I incorrectly placed some beams that later affected the roll cage mounting but after tracing the steps, I could not find a fail. I suspect this is due to Lepin trying to make it work based on Madoca1977’s image-based instruction set. I wonder if Lepin even tried to build this themselves? The issue with this is the roll case is the skeleton that holds the side body panels on, so it’s very loose feeling and you can’t pickup the model from any way other than underneath it. I’m also withholding my Aliexpress seller review until I see missing (and broken) parts replaced in good time.


This article is very helpful to me i learned a lot from this
Hi Dave!
Your article was very useful.
I think I find the solution and reason for “Fail 6 – This was by far the most painful part of this build and biggest fail of all.”
If you still interest I will write it, but it will be a kind of long description.
But with my solution the upper roll cage and the body panel are very rigid and stiff!
BR
Feel free to blog about it then send me the link.
I’ve bought several Lepin sets and the only issues i’ve encountered have been due to transit damage as they send everything without a box. I wonder thgouh if it’s possible that there are fake Lepin sets out there? That said I haven’t had Lepin technic models yet.
One issue that I thought was a problem is the incompatibility of the power functions remotes to Lego receivers. (I have a few trains Lego/Lepin). However, this actually allows running Lego/Lepin trains in parallel without interference. I’m not sure whether the Lepin motors are better/worse/same. I’ve had some issues with both makes with regards to performance.
I bought 60052 and Hogwarts train station and Lego city train station and all have been first rate. Only issue is stickers have been printed on clear plastic, not opaque colour, so eg train decals are faded next to Lego ones.
I do understand qualms about IP etc. but Lego are unreasonably high priced. I only buy Lego these days on promotion discount.
I’d like to get some bluetooth based stuff. If they’ve made the powered up stuff compatible and reliable I will be well chuffed.
I had a similar issue where a Lego motor stopped working after being connected to a Lepin receiver. The problem is due to the design of the connector on the receiver being different, which causes it to push the Lego connector pins inward so that they don’t connect any more when put back on a Lego connector.