
DTM
This is my LEGO ??dpi (25 I think) DTM scanner. The DTM works via a combination of RCX-based code done in NQC / RCXCC, and a program made in Visual Basic (5).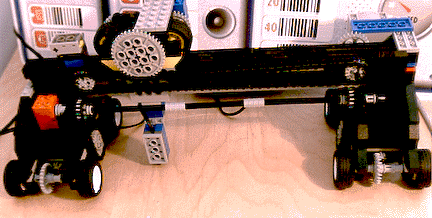
RCX – The RCX is responsible for scanning a line, and populating its datalog with pixel values and then sending a signal for the PC to upload this data. The RCX then waits for the PC to send a signal back to continue.
PC – The VB application will upload the datalog and populate and array. It will also check on a few variables including a line number. With a line number, and the pixel array, the VB app will proceed to draw the image pixel by pixel. The whole process is very slow, but nevertheless, lots of fun to work with… Since there is so much to talk about with this one, I have given it a page of its own.
This is what I like to call a Digital Terrain Modeller. It is really just another fancy name for a digital scanner. First off, I would like to give credit where due:
Simen Svale and his 25dpi Lego Scanner and
KGB AgEnT (a.k.a Clint Rutkas) with his 25dpi Lego Scanner.
Both of these Mindstorms fanatics provided me with source code and ideas as to how I could make my scanner work. Thanks guys!
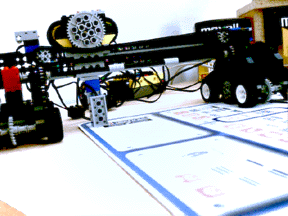
DTM – Action Shot
This is the DTM in action. The process of scanning is quite slow and somewhat boring once you have seen it do one run. The unit consists of 2 motors: 1 micromotor drives the scanner forward through a series of gears/chain links to the left drive unit. The two drive units are connected by a couple of beam/beam connectors so that forward motion is consistent. Drive speed is very minute in order to be able to capture one pixel at a time. The other motor is hidden behind the right side. Its purpose is to drive the chain system to pull the scanner head back and forth across the main bar. This mechanism works quite well as it is stable, and does not cause much vibration for the scanning head. The chain drive moves much the same as a typical bubble-jet printer mechanism does – with one exception. It provides movement to the large gear on the scanner head, which in turn drives the 2 rubber wheels that move the head along the main beam.
[ad name=”GoogleAS728x90″]
Scan Head
A closeup of the scanning head shows some other features. Notice the touch sensor up top. The purpose of this is to provide feedback when the scan head resets itself on startup. The DTM has a rotation sensor (on backside of head) that is responsible for ensuring scan width accuracy. I wanted to also have the rotation sensor provide feedback to help reset the head. The only problem was, that on startup of the RCX, the rotation sensor variable is reset to 0. This is not good if the head happened to finish somewhere other than at start position. So, the touch sensor resolves this for me.

[ad name=”GoogleAS728x90″]
Rotation Sensor
The rotation sensor is mounted directly to one of the sensor head drive wheels. It counts the # of rotations that the scan head makes to get to the other side. For the DTM this was 22 units. This way I was able to ensure constant scan width. I noticed that this does not make much difference for the output image as a few milleseconds difference in each scan can offset pixels. (still trying to solve this problem) The VB code simply takes the RCX uploaded datalog, fills an array, does some colour interpolation, and draws the pixels. I have to build in an algorithm that will try to set a cutoff for the number of pixels scanned and then normalize them across the draw witdth of the output picture.

Rate This Post:  (No Ratings Yet)
![]() Loading...
Loading...

Comments: