
Fix: Samsung Galaxy Tab 3.0 – Won’t Charge
Let’s cut to the chase. You have a Samsung Galaxy Tab and you are tired of 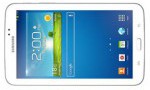 Googling for solutions trying to figure out why your Tab won’t charge. Hopefully this is the last place you have to look. My tab is about 2 yrs old and over the past few months I started noticing it would not charge consistently. I tried all the suggestions; using a different charger, swapping out the cable, disconnecting and re-connecting the battery – none worked. I had also suspected the USB connector port on the tab itself. I should have trusted my first instinct, so I decided to take a look at the charge port on the Tab with my 400x USB microscope, and noticed some significant wear on the pads. Turns out, the fix is ~$5 and less than 10 minutes of effort…Let me also clarify that I have the Galaxy Tab 3 – 8.0″ model. However, the problem may be common to other models, so just make sure you search for the correct port for your Tab. Here’s a link for the Tab 3 8.0″ charge port. Here’s one for the Tab 3 10″. Don’t worry, these guys are legit, even though their name makes me chuckle every time I buy something from there… 🙂 ) If all else fails, you can simply get another tablet.
Symptoms:
- Sometimes, plugging the charger in shows lightning bolt, but does not charge. Other times it does charge.
- Sometimes the unit charges very slow (i.e. gains a few % after a full overnight charge).
- In some cases, the battery appears to drain more quickly.


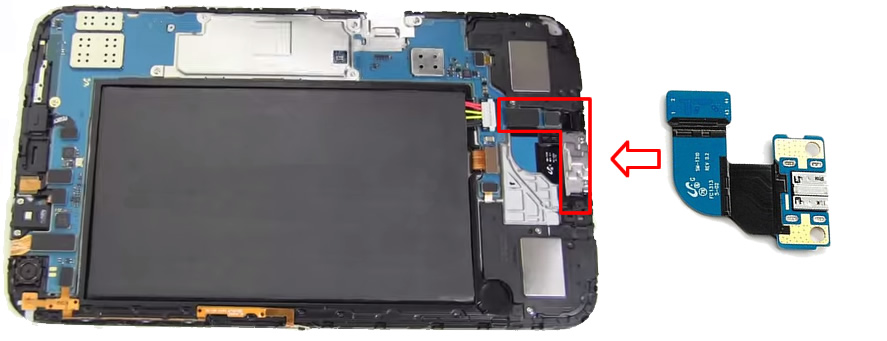
- Purchase a new Tab 3 8.0 USB charge port unit, or a Tab 3 10 Charge Port – depending on your model.
- Remove the back cover – Google videos for how to replace the Tab’s battery. The procedure should be similar for both the Tab 3 and 10. Instructions below are for the 8. All you need to do here is get the back cover off. Pretty simple, and you only really need your fingernails. Or, you can get this toolkit.
- Look at the USB charge unit (see image below – red box). There are 2 screws on each side of the stainless metal plate. Remove them and set aside.
- Carefully disconnect the ribbon connector (black pad in top left in red box below).
- Using your fingers, get under the stainless plate on each side of the usb charge port and pry it out.
- Remove the stainless plate from the bad charge port (it’s stuck on with double-sided sticky tape). Only necessary if the new charge port does not come with one.
- Place stainless steel plate on new unit.
- Reverse the steps above by installing the new USB charge port. You will notice it has to slide under some clips as it’s inserted.
- Carefully re-connect the ribbon connector to the main board, put screws back in, re-install the back cover.
- Get a beer – you just gave your Tab a new life.
Tools / Other:
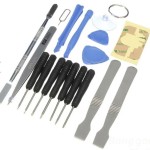
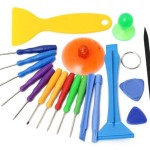
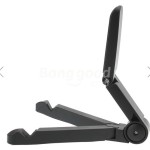
| Toolset | More Tools | Stand | Charger |
 |
 |
 |
 |
Tips:
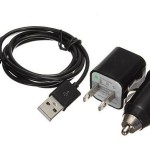
- Charge Cord: Not all USB cables are alike. I have about 10 micro USB cables and only a few of them work when either syncing data or charging the unit. I always use the originally provided Samsung cable. However, I am sure most other quality cables will work as well. Watch out for those cheap cables from overseas, they could be part of your problem.
- Wall adapter / Charger: Ditto from above. Not all chargers are alike. I still use the provided Samsung charger. I have a few others that work as well. You can use most chargers, however, it is important to note the following:
- Voltage: You must use the same voltage as the original charger. For these units, it’s 5 Volts. If you go higher, you will likely fry the charge circuit and be replacing a lot more than the port noted above. If you supply a lower voltage, then the unit will likely not charge at all. You can use a common voltmeter to test, but your charger should be within the range of about 4.8v to 5.5v. I suspect this unit could handle 6v, but it’s a risk to try. It could affect the charge circuit long term.
- Current Rating: Many people are confused about this one. When considering charge current, you have to look at two things; a) the maximum current draw a device can take (think of this as how fast the the device can drink the electricity) and b) the maximum current of the charger unit (this is the ability of the charger to push out the electricity at the current it is being demanded by the device). The Tab 3 has a 2Amp charger. The device charging circuit is also rated at 2Amp input. These two units are suited for each other. If you have to purchase a new charger, look for one that is rated at 2Amps. If you have a charger that is rated with a lower current rating (i.e. your computer charge port is 500mA max), it will still charge the Tab, but much more slowly. You can also get a charger that is rated for higher current. All this means is that the charger has the ability to charge higher current drawing devices. If you have a charger rated at 5v 3Amps, it will charge the Tab fine as the Tab will only draw it’s max (which is 2Amps). Essentially, the device takes what it needs, but is hungry for being fed electricity faster when you charge it with a lower current-providing source.
- Charge port: It was only after I exhausted all other options that I started thinking there could be an issue with the connection between the cable and the charge port. As noted above, I suspected a bad connection between the cable and the charge port (micro USB) slot. When this started, I cycled through different cables and chargers. Some days it would work, others it would not. This made it difficult to pinpoint the issue. After mulling over it for some time, I concluded that it must be something that is getting in the way every-so-often. I decided to get a look inside the Tab’s micro USB port with my 400x USB microscope. At this magnification, you can really see how beat up the contacts get after inserting/removing the USB cable over the years. However, the contacts were still in reasonably good shape and free from oxidation. What I did notice however was the amount of debris and ridges that were created in the port. I figured the only explanation was that, at times, either crap was getting in the way or a bad connection was being made with one of the contacts due to these ridges. Also consider that it’s not just the “+” and “-” that have to make contact. Most of these devices are smart and use the data terminals to check on things like current battery capacity or other device parameters. So, you have to assume that all 4 contacts require a solid connection. If one of the non-charge contacts is not connecting, it’s going to feed the wrong info and the device either wont charge, or will be set to trickle charge. It’s also important to note that you can have contact between two points, but if there is oxidation / debris, this introduces resistance in the circuit which impedes electricity flow. Many chargers these days are smart and this will result in them either not charging at full capacity, or not charging at all. In summary – replacing the entire charge port was the best bet. In my case, this did the trick. See next item.
- USB Cable: It could very well that all your problems are simply because your USB cable is too beaten up and needs to be replaced. This may be the best first option for you to try as you can get these locally.
- Software Update: Both Google and device manufacturers develop power saving and charging routines into the software. These often get tweaked with future revisions of the software. Sometimes a software update is all that is required. Try updating your version of Android to the latest version to see if the problem gets fixed.
- If you’ve tried everything and it still doesn’t work, it may be time for a new tablet?


Thank you!
I was going to send it back to my ebay seller, as my unit is still under warranty. But that would cost me postage money, and I would be deprived from my tablet for 1 or 2 weeks.
I tried this method and it worked. I used a plastic disposable knife to remove the back without damaging anything. I removed the screws, but was unable to remove the piece of hardware you showed. But I was able to lift the black connector, and then pressed it back into place. That did the job. I guess it resetted the battery, and it is currently charging properly. It is also good to know that I can change the battery one day when it finally dies. 🙂
Once again, thank you very much for the information. It solved my non-charging problem!
I’m having the same issue with my tab 3 7″ .. I’ve disconnected the battery twice already with no luck. I read somewhere and started to suspect charging port, so I’m going to try your method .. Thanks & hope this IS the last place I look!
Wondering if the part I need is the entire “L” shaped item or just the silver square box? Thanks
You need the charge port. There is a metal cover plate, but that has nothing to do with the charging itself. Its the mini usb connector that is the issue.
I was able to get to charging port, but my charging port appears to be soldered on. I do not solder, nor do I know anyone that solders. Suggestions?
Hmm.. Not really. Thought all Tab 3’s were the same. You could try cleaning the contact points inside the port. You’ll need a magnifying glass and a needle.
I bought samsung galaxy tab 3 five monthy ago but now battery charges very slowlu it takes 10 to 12 hours to charge
One of the best trouble shooting devices you can buy is a USB voltage / current tester. They are 3 to 10 bucks depending on where you buy it. I bought three it has 1 male and two female USB connectors it’s about 1 inch wide and 2.5 inches long. You plug it into your charging port, and your charge cable into it. It displays the voltage output from the charger to your cable, and the current that your device is drawing at any moment. It’s great for trouble shooting chargers, and cables!
Hi all, mine Tab3 has the problem with charging. Every time I plug in the cable to charge, it will get disconnected at every percent. I have brought it to third party phone repair shop and they replaced the charging port and battery but it still doesn’t work. Has anyone came across with this?
Thanks alot
I just wanted to update all .. I found a friend that soldered, but we could still not remove charging port =( So after reading blog after blog about the issue, I just didn’t want to pay to get it fixed & find out it STILL didn’t work (because after all, “low” got that part fixed AND battery replaced & it still doesn’t work) .. so I bought a new one on Amazon for $125 .. I figured that was probably what I was going to spend to fix it….
..another consideration for everyone – ensure you’ve updated to the latest version of Android for your device. Manufacturers have been known to drop power / charging fixes in there.
same here, changed first the battery, was ok for about a year, now problems again, changed charging port – no success, will go to trash – but is 4 years old and used a lot – so all in all good piece of equipment
I was suffering with same problem, you can try a luck, open your back disconnect your battery connector, then reconnect it, after charge it without turning it on with your laptop, some times it works, and when you battery level become green after 30 minutes of charge then you can charge it with your char
ger. it will work.
I changed my son’s tab3.7 as the charging port broke. It was soldered and followed youtube instructions using a heatgun (about 500 degrees C 930F) on the underside of the port. Came right out after a few seconds and inserted the new port before the solder cools. Works like magic:)
I really wish that Samsung would come up with a preventative fix for this extremely common issue.
I have to solder my charging port on to but i dont know what one to order mine is samsung tablet 3. Sm t210r can someone help me.
You can search for the “usb charge port SM T-210” at Banggood.com or other sites like DX.com
my tab 3 wont turn on what so ever it was working the day before then the next day I went to put it on and nothing happened. ive disconnected the battery. pressed all the buttons everything nothing seems to be working. please help.
put in the new charger connector and within 3 weeks I was having charger problems again. Did Samsung just purchase a low quality charger connector for the galaxy tab.