Cleaning Microsoft Wireless Notebook Laser Mouse 6000
So, since I find myself constantly taking things apart because they are broken, 
needing repair and cleaning, I figured why not post about them on my blog! Surely someone out there will take on the same task at some point in time. That said, here is a DIY cleaning for the Microsoft wireless notebook laser mouse 6000.
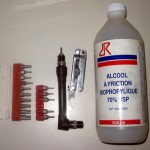
Before you get started, make sure that you have the right tools and cleaning supplies. You will need a Torx screwdriver set (small bits), a multi-knife always helps, some q-tips and isopropyl alcohol for cleaning. Also made sure you have a clean, dust/dirt-free working area.
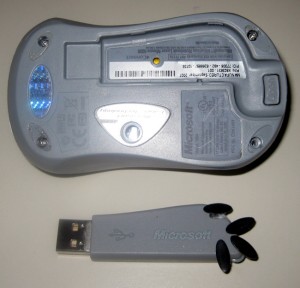
Next, remove the plastic feet from the base of the mouse being careful not to damage them. Don’t forget to remove the battery as well. After you unscrew the mouse, gently pry it apart around all the corners. There may be a bit of resistance, but it should not require much force. Take note of the tiny left side click button when it comes apart as it is loosely sitting in place. It should be self-evident how this goes back in when you are re-assembling the mouse. If you are not sure, here’s a tip – take a picture for a record of where all the components are.
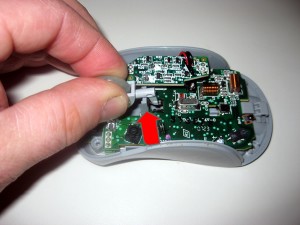
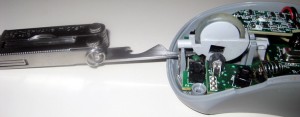
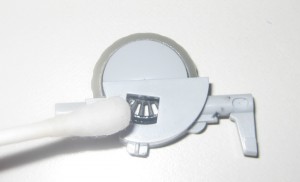
Once you have the mouse apart, you will see all the components inside. The next step is to remove the scroll wheel. The wheel unit uses a snap-fit mechanism to hold it in place. Take some time to see how the wheel has various movements and note the switches that it triggers. You will see there is one for the push click, 2 that are triggered for side-to-side scrolling (down low to the back where the wheel unit enters the main board area). You will also notice the light sensors that are used to detect movement of the wheel. Primarily, you should be focuses on the wheel itself (the clear rubber unit, as well as the lattice inside as this can get clogged up). If you are having trouble removing the front side of the click-wheel, you can use a multi-tool to help pry it upwards. Just be careful of the force you are using.
[ad name=”GoogleAS728x90″]
With the scroll wheel unit removed, used a q-tip and some rubbing alcohol to clean the rubber surrounding (wheel). Also, slowly rotate the wheel while cleaning the inside (black lattice bits). If you notice any crud, or debris, remove it as well.
[ad name=”GoogleAS728x90″]
Once cleaned, simply follow the above steps in reverse.
- Insert the scroll wheel back into the mainboard
- place the side tab click unit where it belongs (make sure it is seated such that it will trigger the switch below it)
- place the mouse body back together.
- Important – there is a tiny reset tab button at the bottom of the mouse. This may have become dislodged. Make sure it is in its place. If you have a really keen eye, you will see in one of my pics above, I already made this mistake. I had to take the unit back apart and re-seat the tab. BTW – I’m talking about the ‘connect’ button used to reset the mouse to connect to its receiver at the bottom of the unit.
- Before screwing the mouse back together, connect it you your PC, insert the battery (while holding it in place) and give it a test. Make sure that all its expected functions work.
- Screw the mouse back together (4 screws). If you don’t have 4 screws, then you are in trouble! If this is your first DIY, and you don’t have the same count of screws you removed – then welcome to DIY – it happens to all of us.
- Stick the plastic feet back on and make sure they are firmly in place.
- You’re done!
Rate This Post:


 (11 votes, average: 4.64 out of 5)
Thanks for your help with this!
You failed to indicated which torx bit(s) are used on this peripheral.
Telling you that would be like telling how they get the caramel in a Caramilk bar! You are just going to have to guess… Have fun. 🙂