
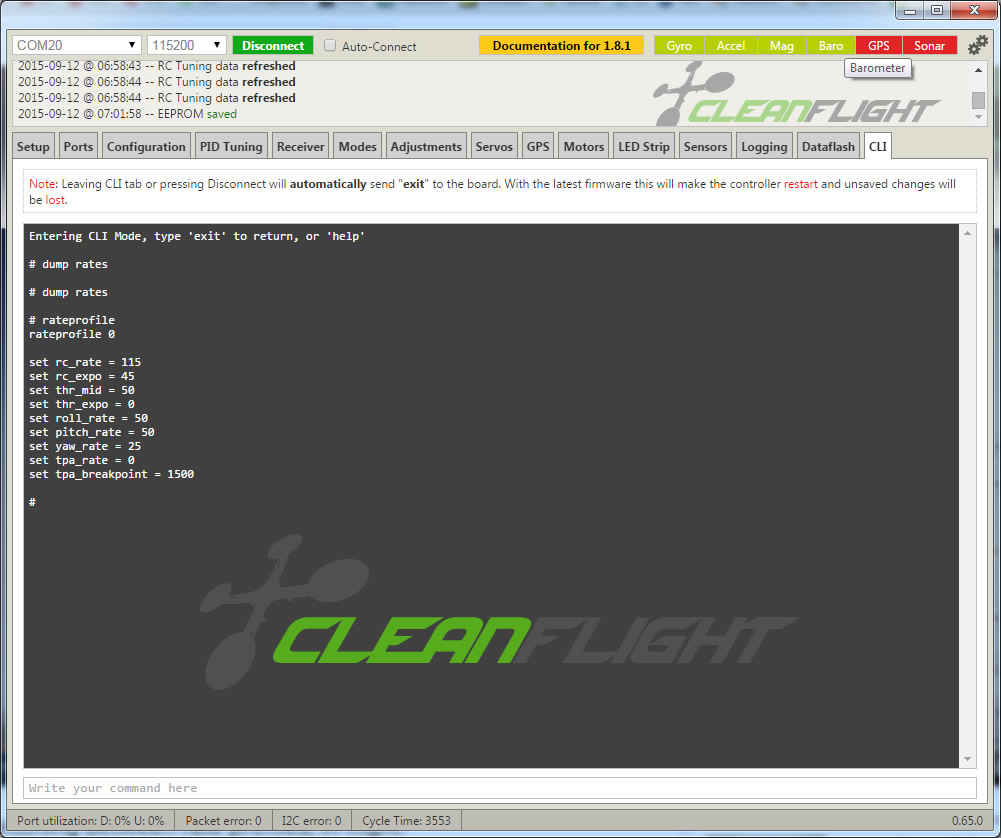
Step 4: Go to the CLI tab. Type in dump rates. You will see your current rateprofile (i.e rateprofile 0). I suggest you start with rateprofile 0. If not showing, type rateprofile 0 to change it. Then type dump rates to see values for this profile. You can now use commands to change each item. For example, type “set rc_rate = 100” to change the value to 1.00. Continue to do this for the ones you want to change. You can see the changes by typing dump rates at any time. You should see your changed values. When done, type save to commit the settings to the current rate profile. Now switch to rate profile 1. Type rateprofile 1 hit enter, then type dump rates to see the values for this profile. Follow the steps above to change it’s rates. Don’t forget to save when done. When complete, check to ensure both profiles have the rates you entered. type rateprofile 0, hit enter, type dump rates and check the values. Do the same for profile 1. After you are done, click over to the Receiver tab. Your FC will reboot, so it may take a few seconds.
Note: When you look at the PID tab, you will only see Profiles 1,2,3 (you dont see 0). Dont worry about this as it seems buggy in 1.8.1. What is key is that rate profile 0 will be your default (toggle off or initial position), and then as you toggle down, it will go to the next profile.
Tip: Earlier, I tried changing these settings in the PID and Receiver tab interface. Although it seemed like it worked, I later found they did not save properly. After powering everything off and then back on, the settings were not as expected. I suspect this will be fixed at some point. For the time being, use the CLI as noted here.
Comments: