BTBox – LEGO Power Functions Bluetooth Controller
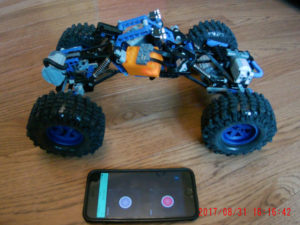 I’ve been on a bit of a LEGO Technic/Mindstorms hiatus for a while – ok, it’s been 7 years! I have an excuse… I’ve been spending much of my hobby time making my own DIY projects / IoT stuff all while mastering Arduino. That changed a few weeks back when I came across THIS. I’ve been thinking of getting an RC crawler for some time, but it struck me that I have 95% of the LEGO pieces, so why not make my own. The one caveat was that I only had the standard LEGO Power Functions IR remote and receiver – which are horrible for range and power handling. I built the crawler, but had to remedy the controller situation.
After doing some research, I discovered SBrick, BuWizz – which are nice solutions if you want something out-the-box, but, if you don’t know me by now… Well, I’m seldom satisfied with status-quo, and I like the challenge making it myself. After spending years in the Arduino world, I became used to doing things my way. I also wanted to use Blynk on my phone (which is my go-to iOS/Android control platform for all my IoT projects). After a bit of research, I picked up a Bluno Beetle and sourced the rest from my existing parts supply. Figuring I had to give it a name, I simply came up with BTBox (Bluetooth in a box). Exciting isn’t it? I hope I’m not infringing on any TM.If so, I can change the name to something else.. Hmm.. Maybe SmartBrick? Doh!
Note: I’m modifying BluCrawler on a regular basis – hit the link here to see my progress.
BTBox:
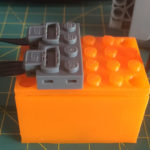 So what does it do? In a nutshell, lets you control your LEGO PF motors via Bluetooth. Nothing earth shattering, I know… except you can do it yourself pretty easy and for < $40CAD in parts.
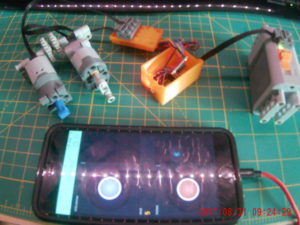
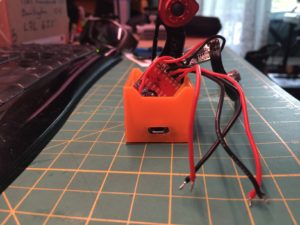
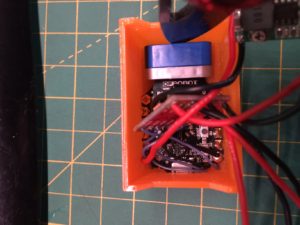
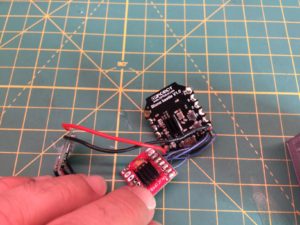
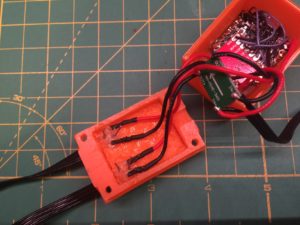
Inside BTBox is a Bluno Beetle Bluetooth Controller (Arduino UNO compatible), a dual-channel H-bridge motor controller, and a switching power supply. The Blynk App (shown below) connects via Bluetooth to the Bluno. The Bluno take commands from Blynk and translates them to motor controller outputs for each motor. Routines take care of how either a LEGO motor or servo are controlled. This version only controls 2 motors, but the PF connectors easily allow me to add 2 XL motors to one connector, and 1 servo motor to the other. I thought of doing a 4-port one, but that’s a challenge for later.
As for PF connections, the essence of it is that the motor power pins connect directly to the battery (9V), while the inner 2 pins (C1, C2) are the control pins which the motor controller feeds +/- signals to tell the motors which direction to turn or, in the case of non-servo motors, the speed and direction. In the case of the Servo, it takes the AnalogWrite() values and interprets them into steps which increment from 0 to 90 degrees in either direction. I believe there are 7 steps in each direction. So, semi-proportional (this is a limit of the LEGO Servo Motor).
Specs:
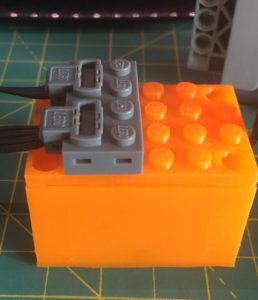
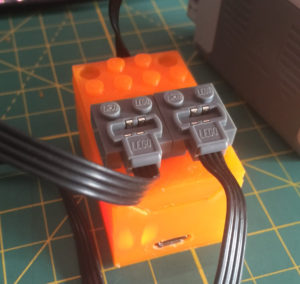
- Custom printed box: 4 studs wide by 6 studs long by I don’t know how many studs high (I guessed). The enclosure was printed on my LulzBot Mini.
- DFRobot Bluno Beetle MCU (Arduino UNO in the IDE). You could also use a Nano/Trinket etc and a Bluetooth Module (i.e. HC-06)
- Motor Controller (tb6612fng)
- Switching Power supply to power the Beetle @ 5V.
- Motors are wired directly to the input from the LEGO LiIon battery box.
- USB port opening in box to allow for uploading customized configurations to the Beetle.
 |
 |
|
|
|
 |
Blynk – Control:
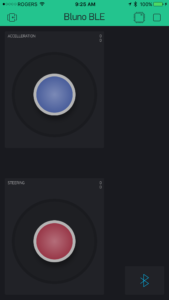
Creating the joysticks and assigning values and pins took all of 5 minutes. The pic on the right shows the simple interface I whipped up. When in landscape mode, the blue stick controls the drive motors, the red controls steering. If you’re a keener, you’re probably asking how it works given each joystick has both x and y values. I simply just use 1 axis for each. I could easily modify this to use 1 joystick for both drive and steering – with a little code tweaking in Arduino, and done!
Between Blynk and Arduino, you can have full control over how the motors are controlled. You could even extend by adding custom sensors interfacing with the Bluno and receive updates in Blynk. For example, I’m considering adding a temp sensor to the motor driver chip that will report temp on the Blynk interface.. I can even customize it to show a value + turn a LED on / off, or have it go from varying degrees of colour.. i.e. green = cool, red = hot etc… Sky is the limit if you know Arduino.
If you are into IoT and you have not heard of Blynk, you don’t know what you are missing. IMHO, it’s by far the most flexible easy to use solution for creating apps on your smartphone to control things over WiFi or Bluetooth.
Performance:
I built this as a challenge to see if I could replicate features and functions that are available out there in other Bluetooth controllers. As noted, I wanted to be able to use Blynk as well as create my own sketches and customize motor drive profiles. The unit allows for a direct connection between the motor ports and the LEGO PF LiIon battery box via the motor controller. The controller has a max current of 2A – which is suitable for all LEGO motors and even the XL motors. Given I banged this together in a matter of hours, I am very impressed with how well it all worked out. While testing it on BluCrawler, it has no problem providing whatever the LEGO battery box can provide. I’ve been thinking of throwing a 3S Lipo at it but need to be careful as they charge up to just over 12V on full charge – which could be a problem for the LEGO motors (max rated at 12V). That said, I’m probably going to have a go at it.
The Good:
- DIY. Full customization if you have the skills.
- You can use any controller that uses Bluetooth serial output. I’m also making an analog joystick that will pair with this.
- Less expensive than what is out there to date.
Drawbacks:
- It only has 2 ports. I’m already thinking of a 4 port version.
- not off-the-shelf. You have to make it. That said, if you are not the DIY type, this is not for you.
Want to Make One?
I’ve decided to take a different approach on sharing for this project. It was a lot of work and time determining the components, and coming up with the code as well as documenting it. For a small PayPal donation of $5 or more (c’mon, it’s a Starbucks coffee… Wait! Even those are > $5 now! :-), I will share the details on how to build one including an Arduino sketch, BOM, STLs for the top/bottom of the box, and the circuit. Before you make it, please be sure to read the above details to know what you are getting into. Also note that I’m just a guy who loves doing this stuff as a hobby. Having a full time job, being a dad and coaching soccer provides me limited time for my hobbies. It’s expected you know enough to understand how to put this all together. Your donation does not cover support. If it’s a simple clarification, I’m happy to help but please don’t expect rapid responses. Also keep in mind there are plenty of resources out there for Arduino and Blynk. Click donate below, and I’ll send you instructions + the Arduino sketch with 48 hrs.




Where can I find 3D model of the box
Details should all be in the write-up.
Are you still providing the instructions for a donation?
Yes. Responded to your email.
How much is the cost to make it without the box ? Is it possible to use a playstation controler ? Can it fit in a smaller box like the Lego IR ?
Hi.
How much is the cost to make it without the box ? You can make your own box. You can determine cost by pricing out each item.
Is it possible to use a playstation controler ? I suggest Googling the controller and the Bluno Beetle. There’s likely a way to do it.
Can it fit in a smaller box like the Lego IR ? Doubt it.