
WeatherCloud – IoT
So, my son’s been bugging me to get him some of those LED strips for his room. You know the ones that you see on Amazon with the remote controls. Pffttt.. I couldn’t just go with status quo, so instead with a little grit and some free time I got on the LED cloud bandwagon and built him something a big puffy cloud with lights – what every teen wants right? 😉
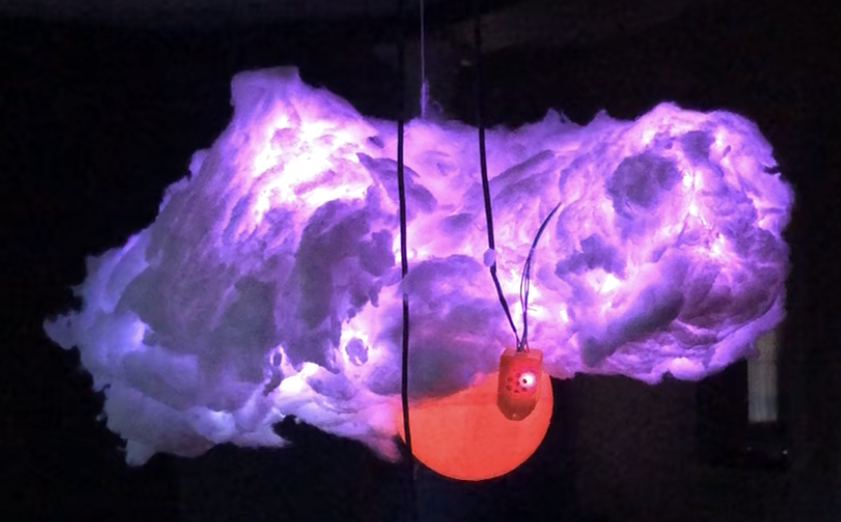
What is it? It’s a LED weather cloud. What does it do? First it displays weather forecast info using weather data from DarkSky.net. Data is parsed from a JSON feed and rendered in LED sequences in the cloud (rain, sunny, thunderstorms etc).
Second (this is the “dude that’s cool” bit) – It uses Blynk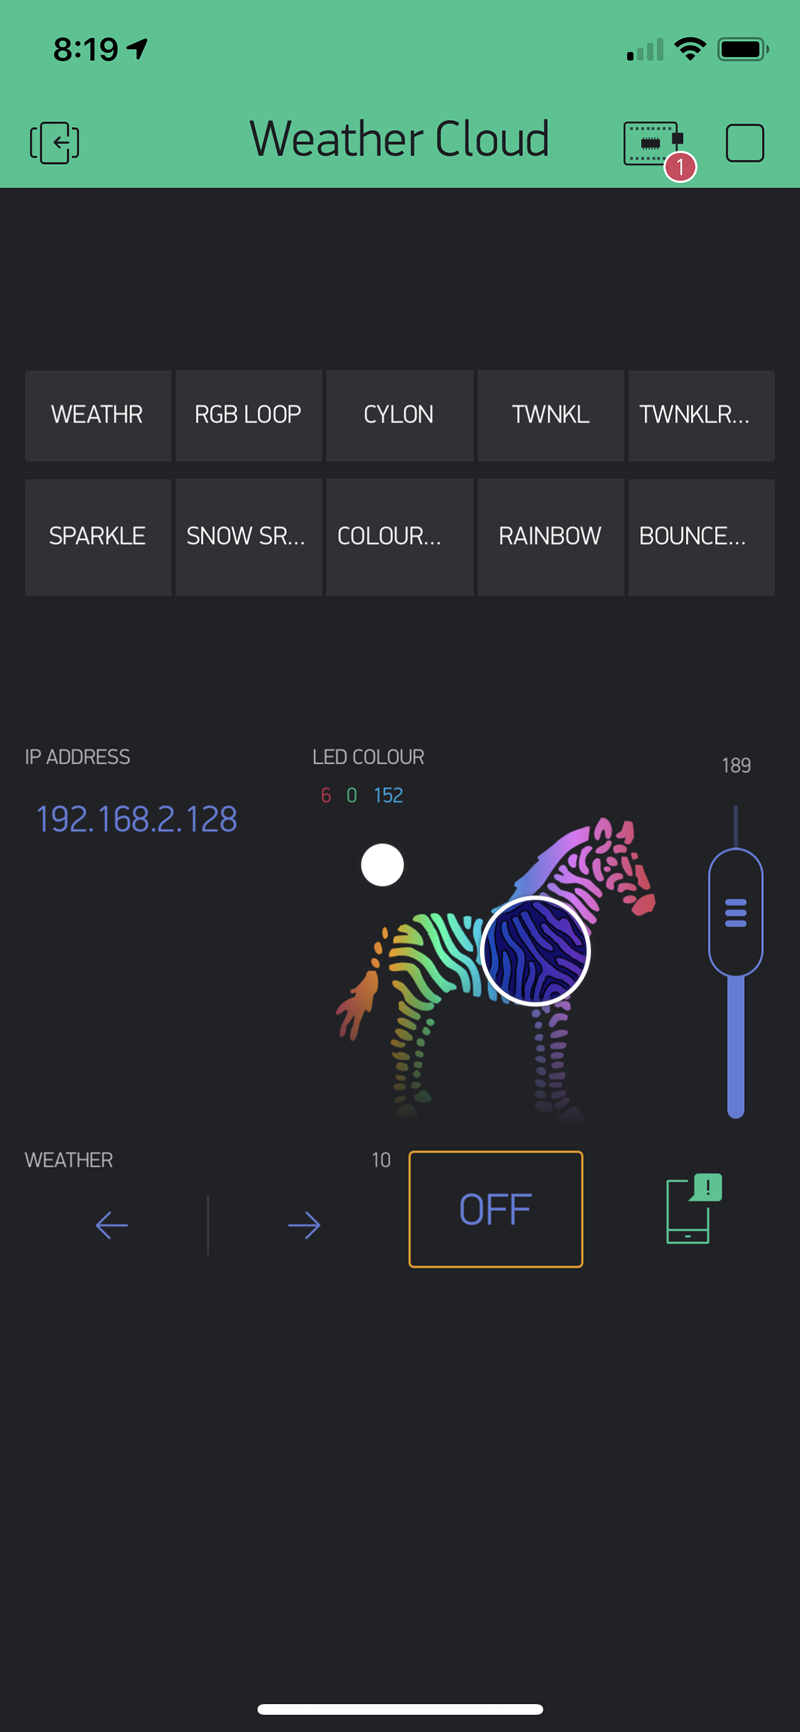 so my son can use his phone to set manual lightning sequences or RGB colours (e.g. sparkles, bouncing balls, any colour want etc). So I suppose it’s a mood light as well. So a big puffy, Internet-connected weather mood light. BPICWML.
The video below demonstrates first all the LED sequences that can be controlled by the Blynk app, and secondly some weather patterns that would show based on current weather conditions. I had a “duh” moment after realizing I videoed from the backside (showing the ESP8266 controller case) and missed the moon (on the lower left in front). Meh…
Build Info:
It’s pretty easy to build with only a few components needed. It’s also low voltage and the LEDs and controller are sealed (they don’t get hot), so I would say this is pretty good on the safety scale. Probably much safer than anything electrical you can find at a dollar store! 😉
- MCU: NodeMCU ESP8266 Mini. Can be made with other WiFi-enabled MCU’s.
- NeoPixel LED Strip: Given the price these days, I typically buy 5M meter lengths, but you only need about 3ft. For this build i used these which have the WS28912B chips (these are my go-to LED’s these days). Also used in my Basement Disco project.
- Power Supply: As the LED strip is limited to 76 pixels, it doesn’t have a lot of current demand. I’m using a 5V Apple charger that provides 2 Amps. Between the ESP8266 and the strip, you will need at least 1 Amp. Most chargers can handle 2 Amps+ these days.
- Connections: Probably the easiest project out there. Power both the ESP8266 and the LED strip with the 5V + and GND connections. Make sure ground on both are connected to each other. The NeoPixel strip Data line goes to D4 on the NodeMCU. Done.
- Blynk App: Although not required, this project uses Blynk which allows controlling IoT devices such as ESP’s, Arduino’s, Raspberry Pi’s etc via your phone. I’m a huge fan of Blynk as it’s easy to use and blows away the competition IMHO. If you want to build this yourself and not use Blynk, you will have to hack out the Blynk bits and just use standard WiFi connectivity. This would require intermediate knowledge of working with Arduino and ESP8266 devices / code. For most who have done this before, it’s an easy hack, and there are many samples out there. You can also easily use an ESP32 with minimal changes to code.
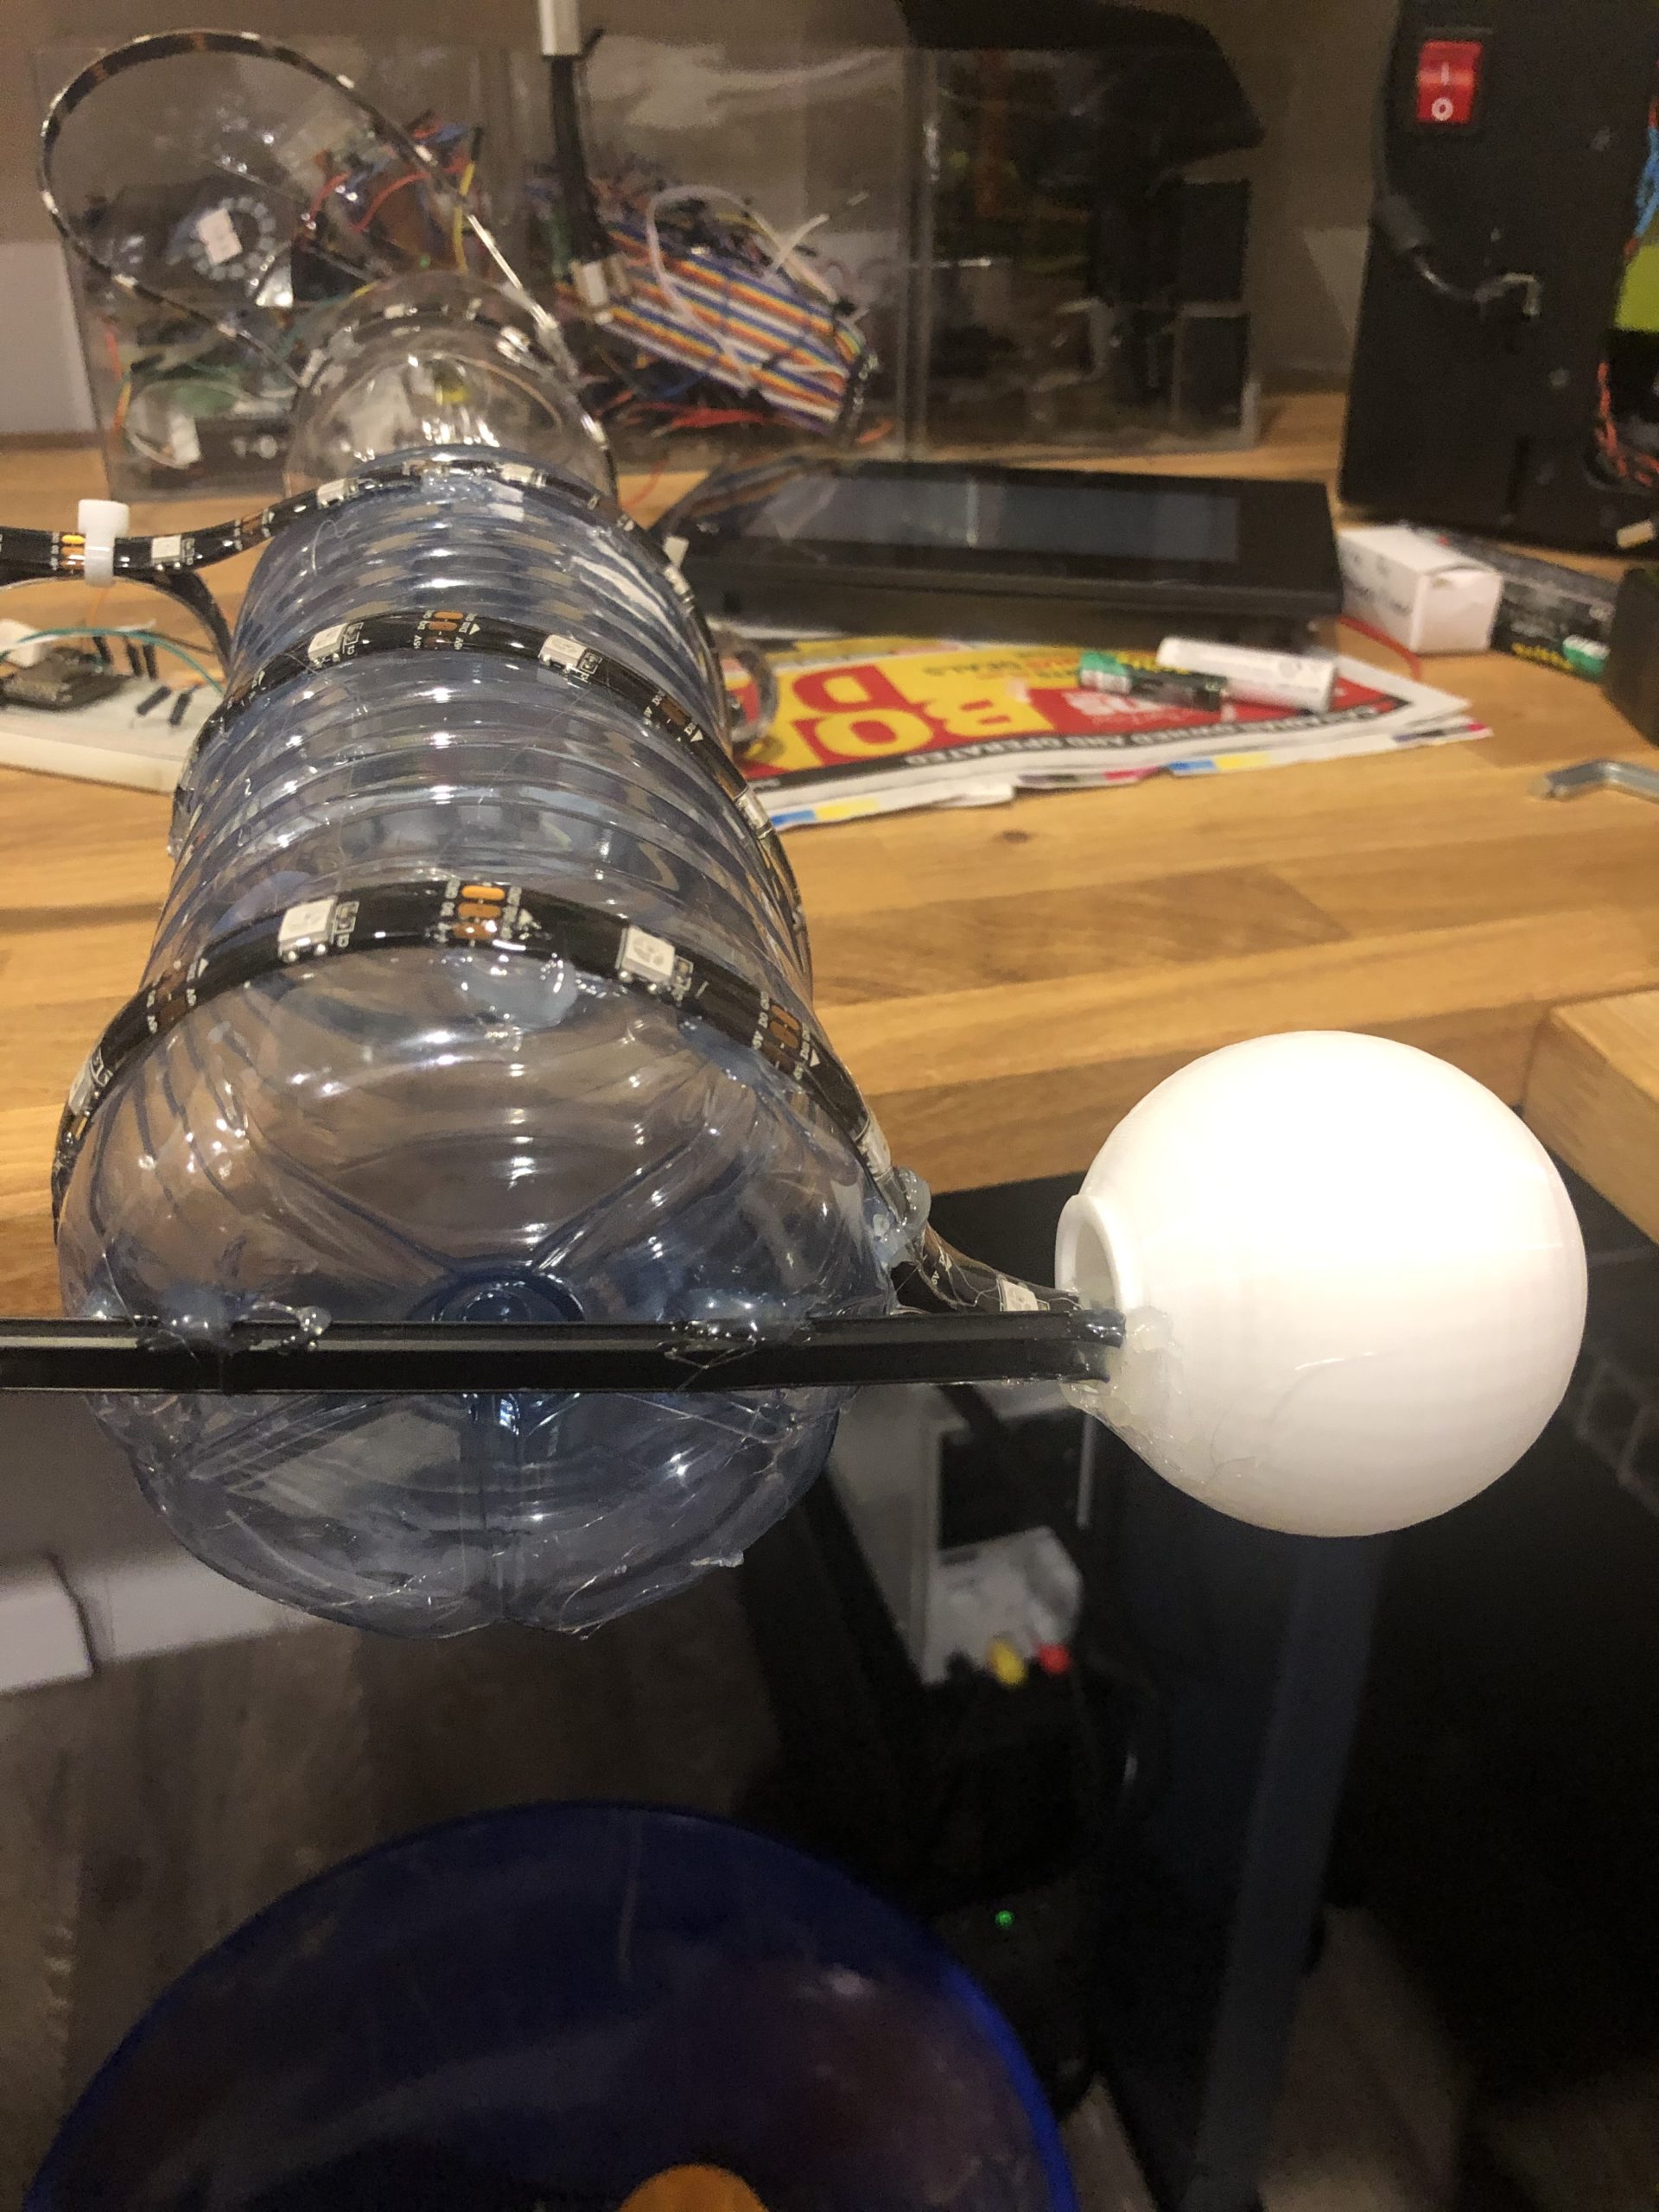
- The Cloud: The skeleton of the unit uses 2 plastic pop bottles glued them together with hot glue. The LED strip was then glued around the bottles in a spiral. Notice that I left a few sections with extra LED’s as this is where the cloud material was added to give the cloud a natural look. After connecting some string for mounting, the ESP control unit and power cable, the fun started. I used an old pillow with polyfill to make the cloud fluff. It required a lot of hot glue to make sure you have a bag of sticks (est. 10 sticks). It only needed about 3/4 of the pillow material. You can also get the material at your local craft store (e.g. Michaels).
- Data Source: Apple recently purchased DarkSky.net and have shut down the free API access for new registrants. If you have an existing account, you are good. If not, then you have to look for an alternate source of weather data. Over the coming month or so, I’m going to be looking at Weatherbit.io as another source for free data for this and other projects.
Code:
Please first read my Disclaimer. The code is where all the art exists, and is a mash-up of code from my WIoT-2 weather project, Basement Disco project and others including some online samples of different LED effects for which some I modified to represent weather such as rain, snow, sleet, cloudy etc.
- Version 4
The below video shows early stages with 2 plastic bottles making the skeleton. Video shows testing the lightning sequence (trying to get it to appear natural with randomness). The LED strip is left dangling in some areas as the cloud will have peaks that need to be lit up. Also, what isn’t shown are the LED’s bunched together in the middle (for the sun) and the end (to the right) where I’ve popped on a 3D printed moon.
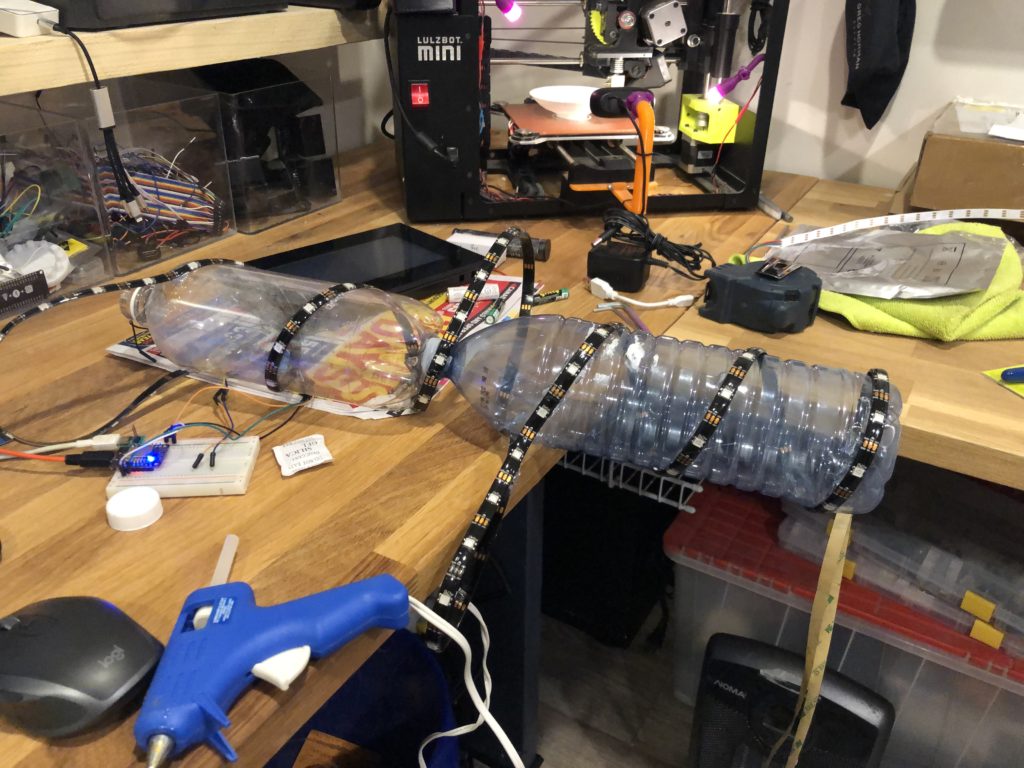
Skeleton with LED’s mounted 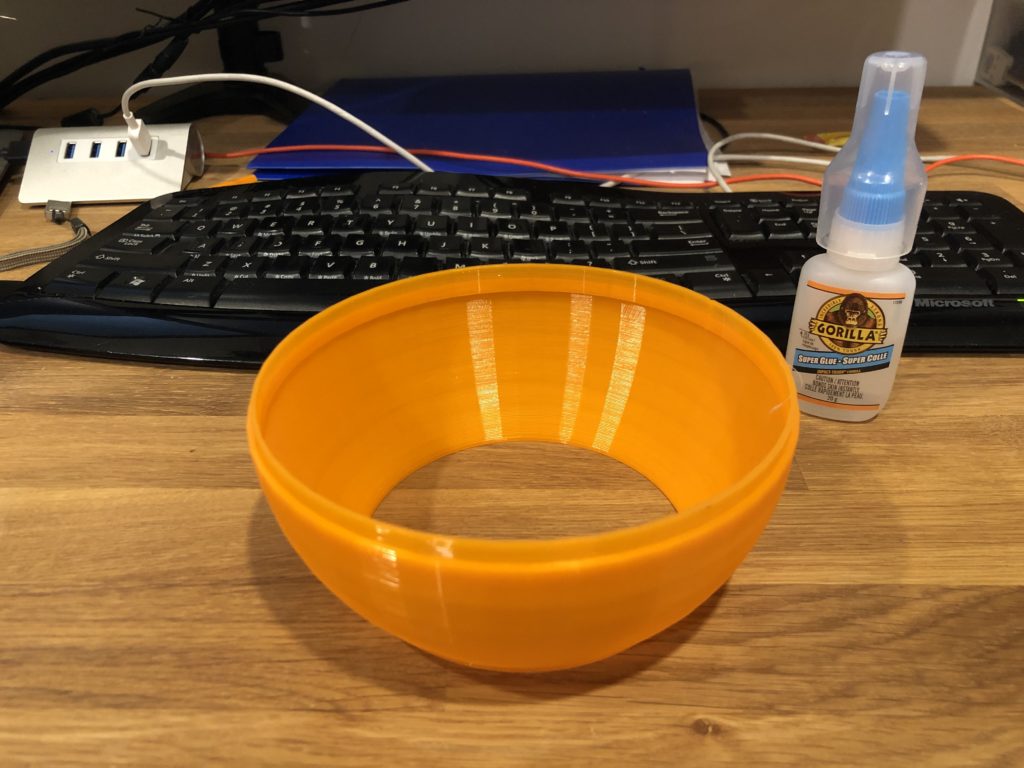
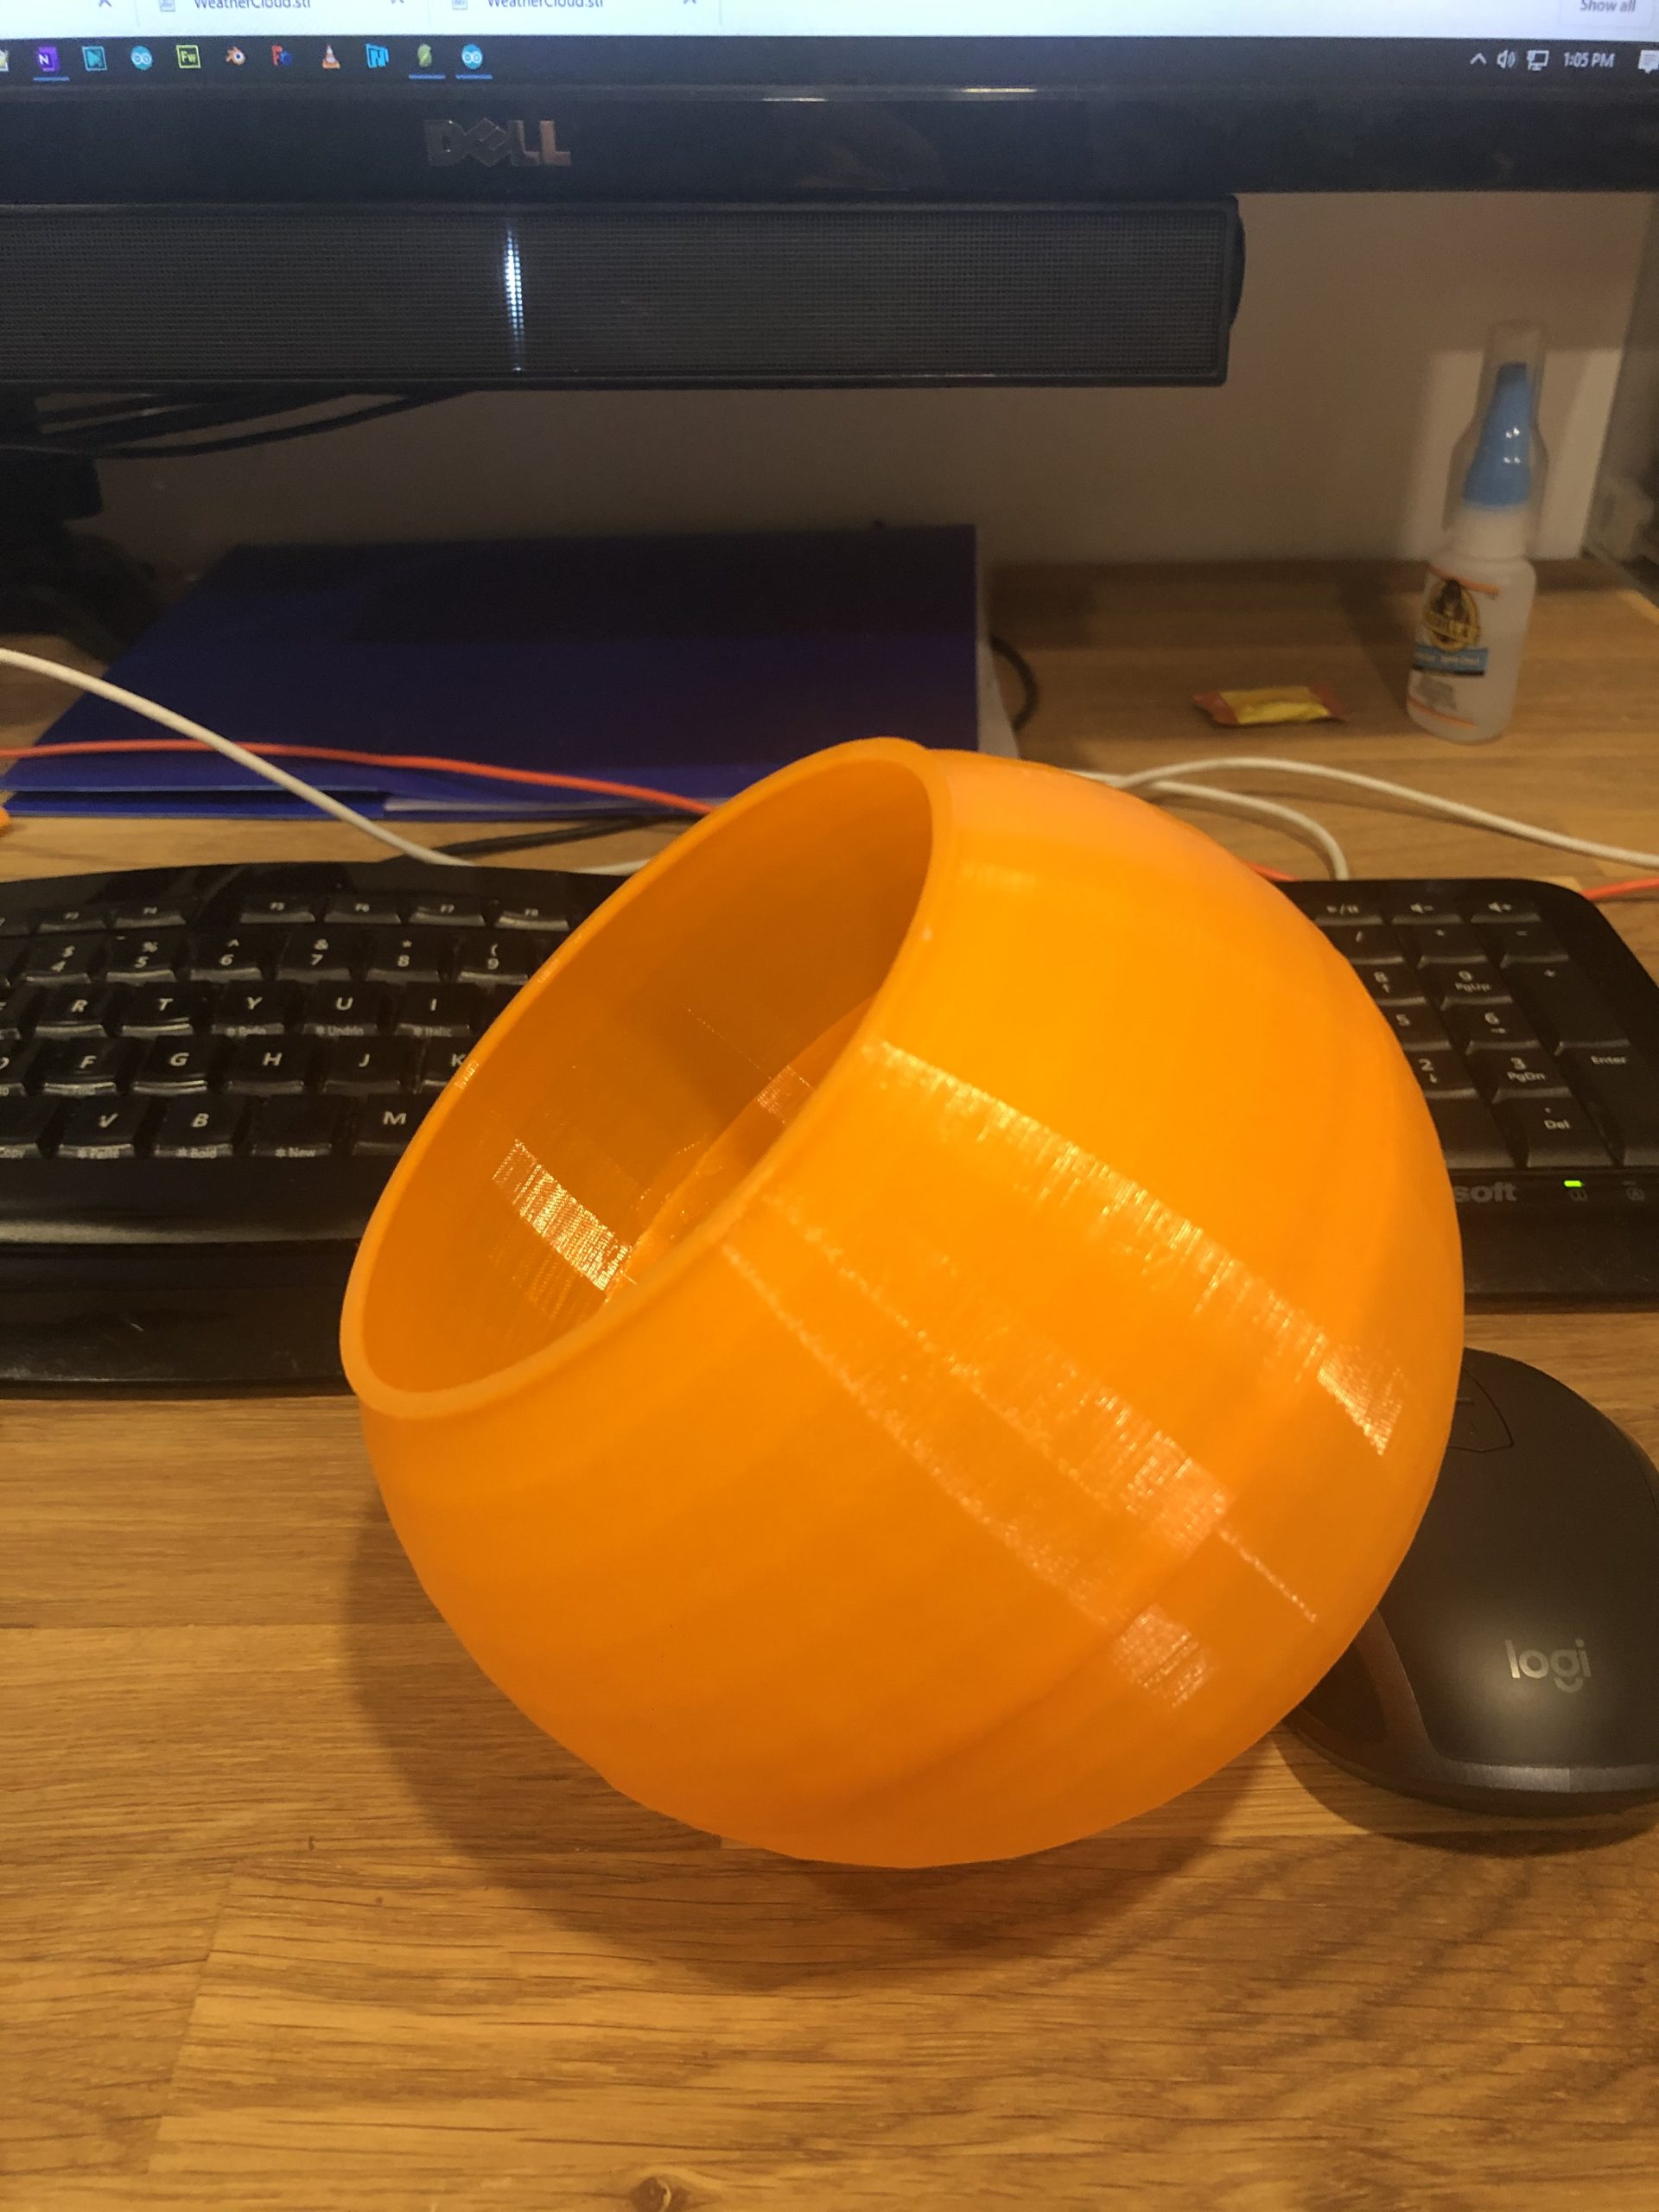
3D Printed Sun bottom 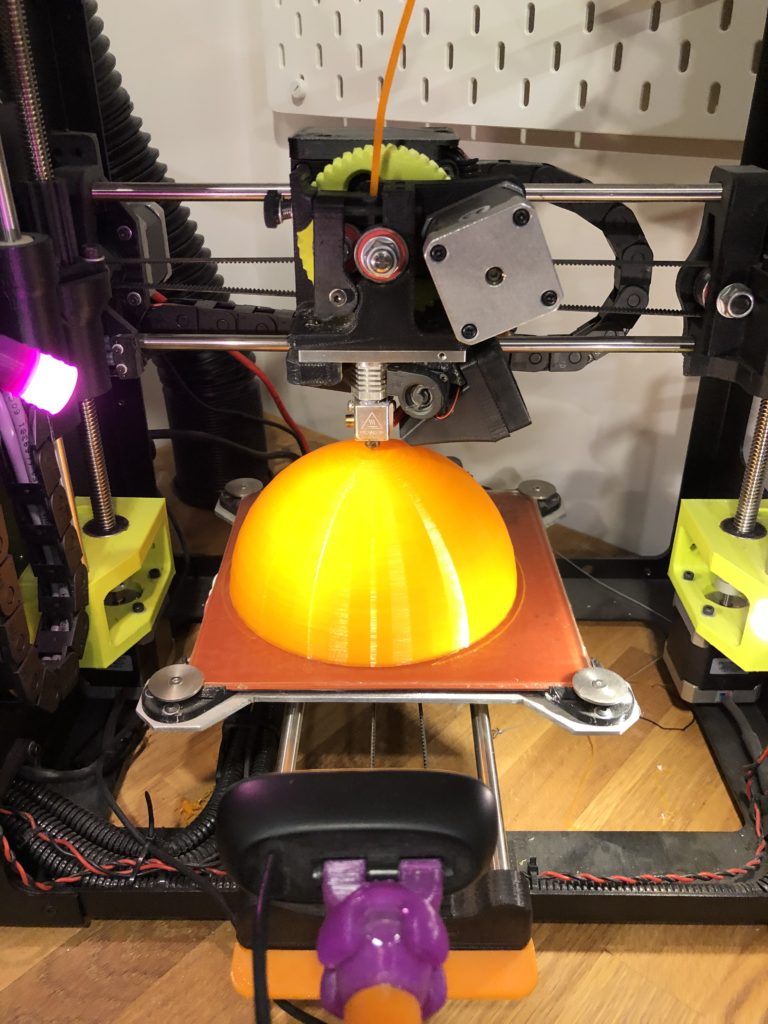
Printing the top 
Moon mounted 
Glueing the Sun together


Comments: