
RTLapseCAM: Resin Printer Time-Lapse with M5Stick-C Plus & GoPro
Having recently finished my ESP32Cam time-lapse project, I wasn’t overly impressed with the picture quality and was concerned over the stability of the code while running long prints. Shortly after completion, I started looking for other options and found you can control a GoPro Hero from wireless/bluetooth devices – including ESP32s, 8266’s etc (yeah, it’s old news but I’m on it!). The idea is straight forward – watch for a layer change via the UV light and snap a photo – repeat! Easy peasy right? What should have been a simple project turned out to be a week long effort figuring out comms issues with the GoPro. Hopefully this write-up will save you the pain if you decide to do this yourself. Read on to see how I solved it….
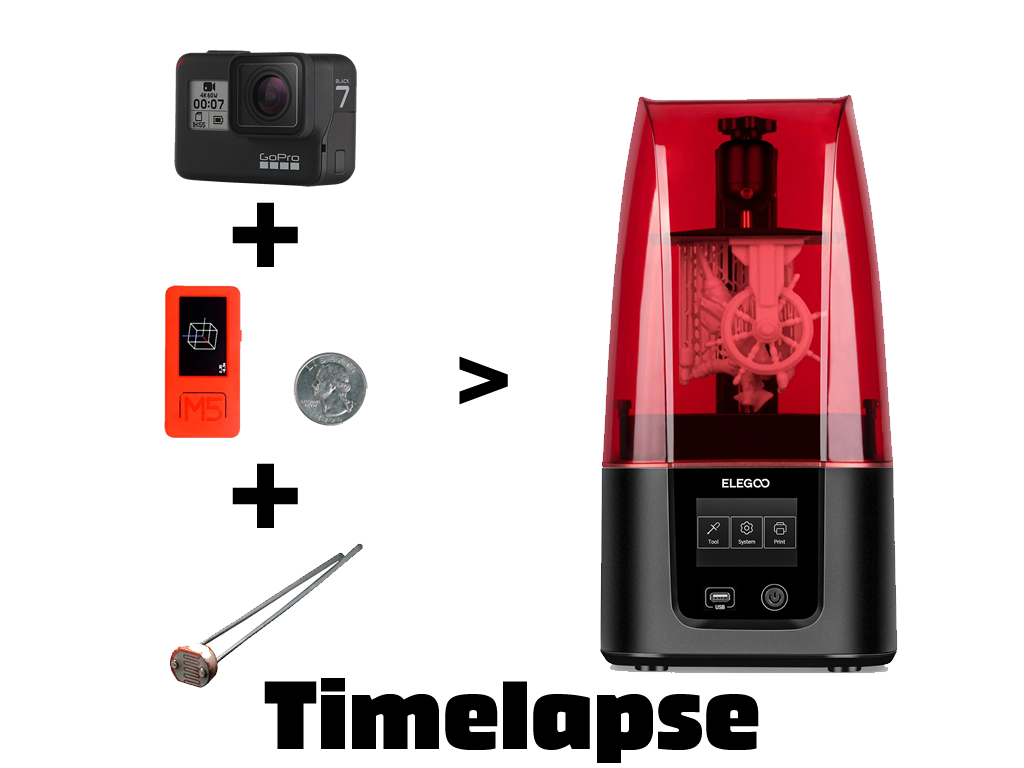
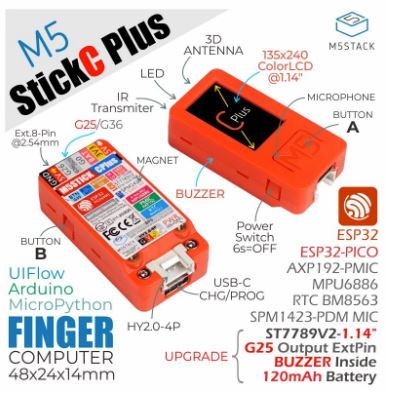
Similar to my ESP32Cam project, the idea was to record a series of photos that can later be packaged together into a time-lapse video. It would use a similar approach by triggering a photo with each layer change (when UV light comes on). This is done with a photoresistor (LDR) sensor connected to the M5Stick-C Plus that detects the UV light transitions. BTW, the M5Stick-C Plus packs a punch in terms of features (battery, TFT screen, buzzer, Gyro, and the list goes on…). I bought it on a whim and have no regrets! The below clips shows my first test run. To process it into a time-lapse, I used VSDC’s animation feature with the video sped up by 700% to get the below smooth video (I’ll probably try 800-1000% next time as it’s still a bit slow).
Challenges:
If you’ve tried connecting to your GoPro before, maybe you’ve run across this issue. I’m using the GoProControl library (uses WiFi) but there’s also GoProBLE (uses Bluetooth) – both excellent libraries. There’s also a number of other resources out there including this, and this great repository of configuration parameters. Originally, I wanted to use Blynk to enable remote control from my phone (like I did with RTLapseCAM ). The challenge is I would have to connect the phone and the ESP via home network WiFi, but since the GoPro has it’s own WiFi network, there goes that idea. I then looked at a mix of home WiFi for Blynk > ESP32 and ESP32 > GoPro via BLE. After trying the BLE code, I was faced will numerous issues. I could connect to the GoPro but it would not process commands. I didn’t solve it but I think it was unable to make a secure connection (part of the NimBLE library). It was beyond me and I was running out of patience.
Onto GoProControl which connects to the GoPro’s own WiFi. Again I had all sorts of issues. I could get the ESP connected to the GoPro WiFi but it would constantly drop soon after connected and would not accept any commands – even keepAlive(). I spent nearly a week trying to debug this and was hitting dead ends everywhere I looked. For some time, I thought my GoPro was defective. I found that only when I completely reset the wireless connections on the GoPro it would work – but only for the first time, then fail from there on. Then I figured it out. At the time, I was ready to throw in the towel with frustration, I don’t even recall how I figured it out I had tried so many things and had code overflowing with debugging. Essentially, the GoPro (Hero 7 Black in my case) does not like it when the ESP disconnects in a non-graceful way. Yep, that simple.
I found that if I called gp.end() before disconnecting and powering down either device, I could re-power, re-connect to the GoPro WiFi and take photos. The sketch shows how I addressed this but essentially I built it into the main button as a start/stop recording feature. The icing on the cake is the M5Stick-C Plus I’m using has a built-in battery and stays on after removing USB power! That way if I accidentally forget to click stop, I have code to call it automatically after a period of time. I’ve built in some battery monitoring, but it currently only displays info. On my to-to list is to have it detect USB power removal, then low battery, then trigger a graceful close of the GoPro connection (if not already done so). So a happy end. However, my ideal situation would have been to be able to use Blynk on my phone, connected to the M5Stick which in turn is controlling the GoPro, but this became too much of an effort and frankly it works well enough now, and I was drained as this was supposed to be an easy build! Also, the M5Stick-C Plus is a great little MCU with tonnes of features and a display to boot. I essentially have all the control and reporting I need on this tiny little thing.
How it Works:
This is a code walk-through of sorts. After the M5 sets up the HMI, it attempts to connect to the GoPro. This will repeat until it makes a connection (not much sense in proceeding if it doesn’t). Once established, it sets the GoPro to Photo mode, the M5 HMI is setup on screen, then the main loop begins. During the loop key activities take place including checking the state of the M5 buttons (for clicks), reading and averaging the LDR sensor, providing refreshed stats to the HMI (every 2 seconds by timer). Once the main button (BtnA – the one on top) is clicked, it sets the GoPro connection status and initiates activity to trigger a photo on the GoPro every time it sees a transition from dark to light on the LDR. It only takes 1 photo per transition, so it doesn’t matter how long it’s dark or light. There’s one caveat to that. There’s also a timer monitoring idle time – which effectively is watching for the print to be done (as the UV lights stay off). This timer is currently set at 120 seconds. After that it sets the M5 to stop recording, calls gp.end() (important!) and resets key variables. If BtnA is pressed for > 2 seconds, it will close connection with the GoPro. There are also 2 other buttons. Pressing BtnB allows you to set frame skipping which essentially speeds up the video. There are 3 settings: 0 – take a picture with each layer change, and 2 or 4 to skip every 2/4 layer changes before taking the next frame. Recording can be stopped and started at any time. It doesn’t affect the time-lapse as the GoPro handles the photo naming and will just increment the photo number. The code also contains commented reference to numerous other commands not currently used in this project, but may be useful later.
Components / Materials:
- Microcontroller: M5StickC-Plus or other similar ESP32. Should also work on ESP8266’s or MKR’s
- LDR Photoresistors (suggest getting > 1)
- 1x 10K Ohm resistor
- If you are looking for a resin printer, check some out here
- Don’t forget a good USB power supply (2 Amps should do)
- Full disclosure, I get a small referral fee if you buy from the above links. You don’t pay any more, but a fraction goes to me to help support my projects.
The Build:
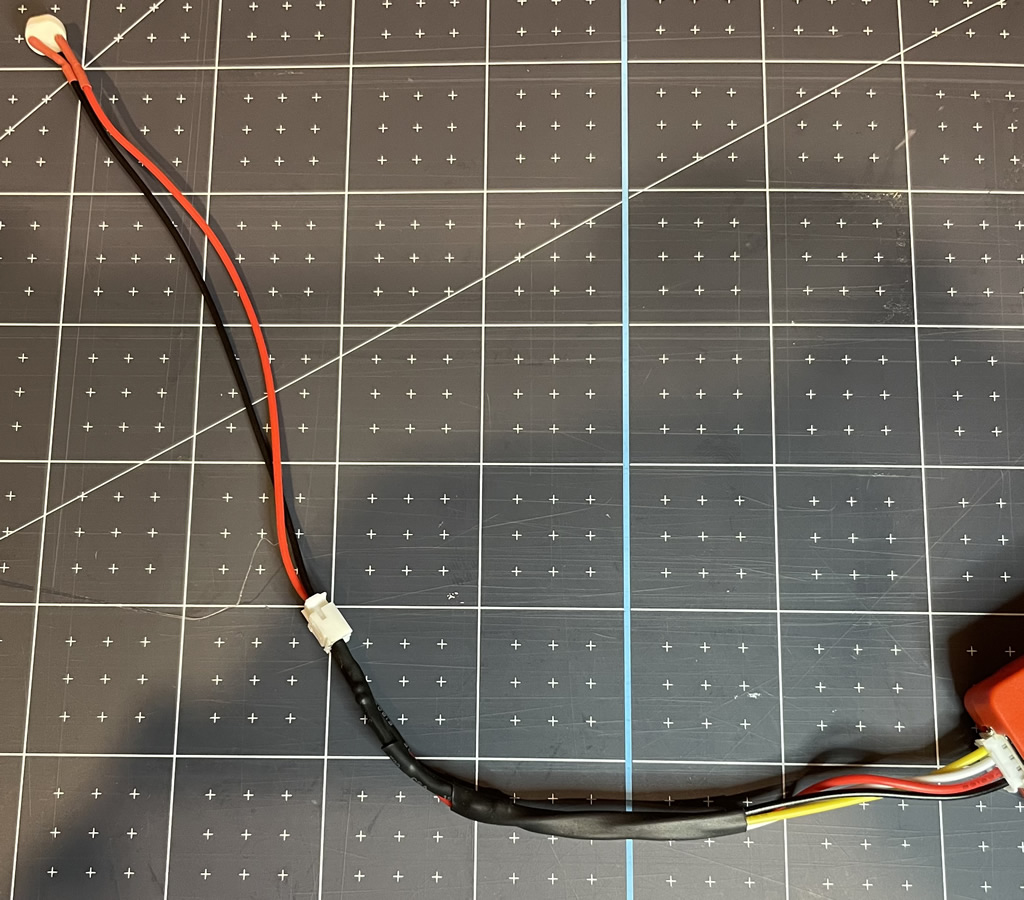
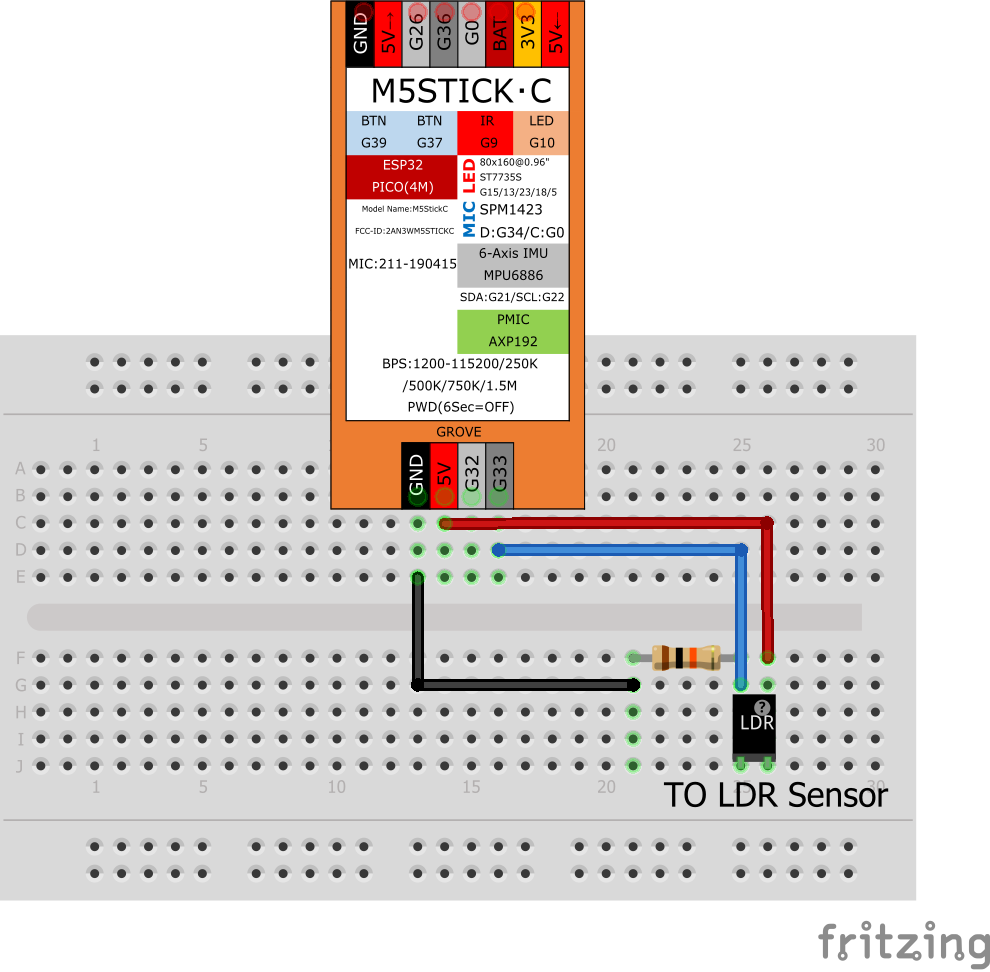
Mounting the LDR sensor is fairly straight forward. Before doing so, you will need to create a cable to allow it to run into the printer and connect to the M5. I suggest using an old USB extension cable unit around 3ft long. As the LDR is 5V and very low current, most USB cables will be fine (it only needs 2 wires). Use the below diagram to wire the LDR and 10K resistor to the M5 MCU. In my case, I created a pigtail that integrates the resistor and uses the M5 groove connector. Connections are 5V, GND and pin 33. The resistor pulls pin 33 to GND and is within the pigtail. That’s it!
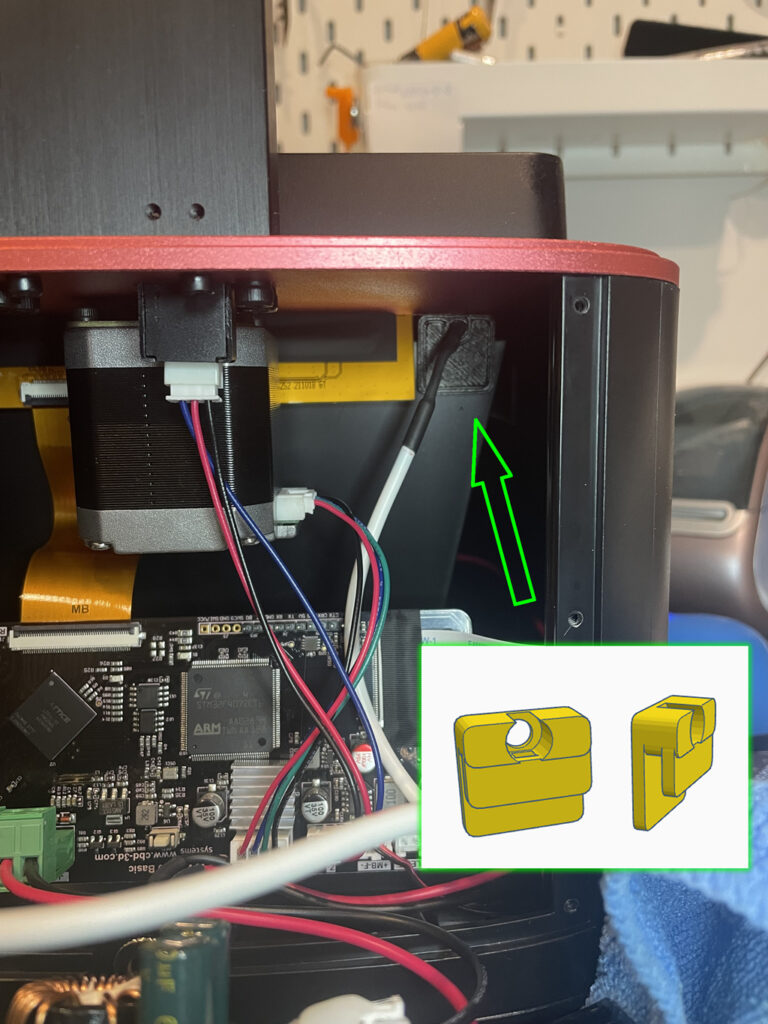
Below shows the LDR sensor installed using a custom printed bracket (you can download it here). No glue or screws were used. It just pressure-fits along the plastic rim looking over into where the UV LED’s shine up onto the TFT screen. It also does not interfere with the light path/screen etc. The area at the top there is open between the red metal top plate and the black “bucket” that holes the UV LED’s.
Your Support is Appreciated: A lot of time is put into designing and building these projects, the creation and editing of videos and pulling together my build logs. If you find this useful, please consider a small donation – buy me a coffee as they say 🙂 It will go to purchasing new items/components for future projects and help support the work I do here. You can support me either via Ko-Fi or Paypal below. Additionally, clicking the above product/part links also helps and it costs you nothing. Thanks!
Usage & Code: Please see my Disclaimer page.


Please help I keep getting this error upon compiling “Compilation error: ‘HERO7’ was not declared in this scope”